Essential Guide to Shop Drawings (Video)
This document will show you how to use the shop drawings (hsbInOutput\Shop drawings).
Available Video’s of Shop Drawings
How to make Shop Drawings and set them in a Plot Viewport and make a PDF
How to make Shop Drawings and set them in a Plot Viewport
How to change Layouts in Shop Drawings
How to change beam colour in a Shop Drawing layout with the style manager
Introduction
In hsbcad you have Element drawings that can be generated automatically in the Paper space environment.
This is done by adding hsbcad information to a standard AutoCAD viewport.
Shop drawings are used in the Model space environment and are used to make loose material drawings.
Multipage Shop Drawings are divided into different Styles, they can be done per individual item (beam, log, sip…) and they can be done per Element, Group, Module or Subassembly.
Soon to be added are Multipage Styles for Truss & Collection Entities.
Multipage commands
External Drawing (How to creat an External Shop Drawing)
There are 4 commands introduced in hsbcad 2011 which relate to the Multipage Shop Drawings.
- Run the command hsbInOutput\Shop Drawing\New Shop drawings\Shop drawing add multipage.
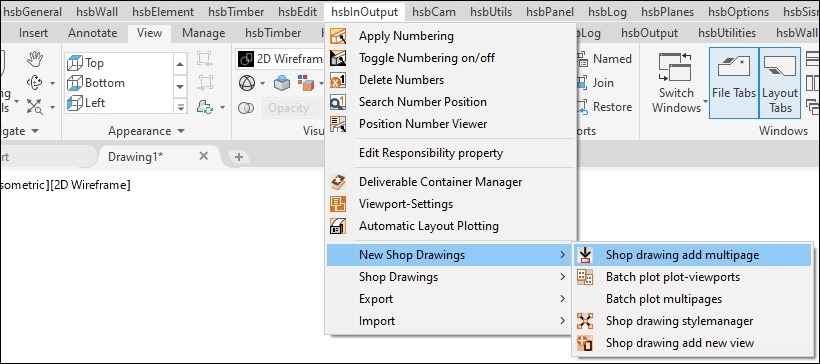
Shop drawing add multipage
Command Line HSB_SHOPDRAW_ADDMULTIPAGE
- Run the command hsbInOutput\Shop Drawing\New Shop drawings\Shop drawing add multipage or select Shop drawing add multipage in the Ribbon.

When a style hasn’t been defined in your drawing yet, an alert dialog box will pop up and ask you to import a style, select OK. (Standard styles have been made)

The Import standard styles dialog box will appear and you have default styles to choose from, Metric CM, Metric M, Metric MM panel, Metric MM, Metric Japan.
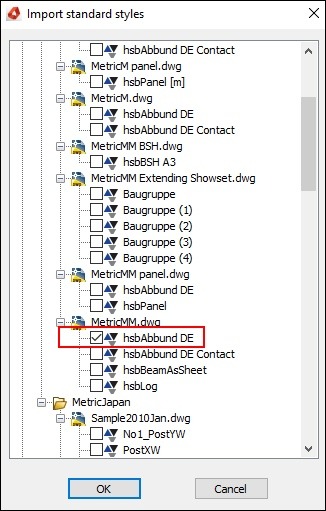
- Select a style or multiple styles and select OK. (In this case select the hsbAbbund DE style)
BLOCK_WARNING_START
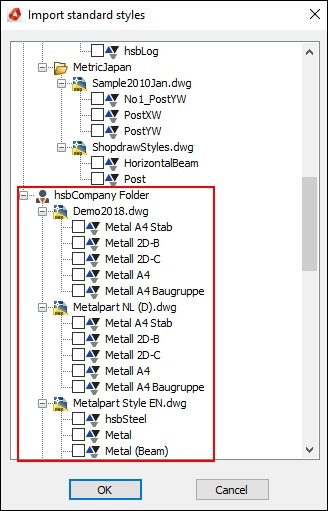
IMPORTANT: the standard styles are saved in C:\Program Files\hsbcad \hsbcad 20….\Support. In case you have custom made styles made for you, you can save these drawings in C:\hsbCompany\Support, then they will appear in this dialog box.
BLOCK__END
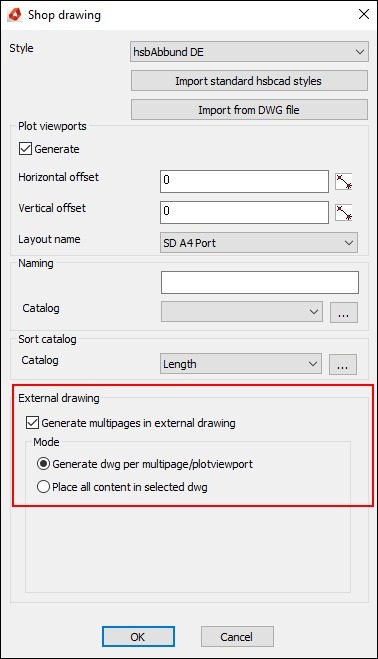
The Shop drawing dialog box will appear and the selected style will automatically appear in the style pull down menu.
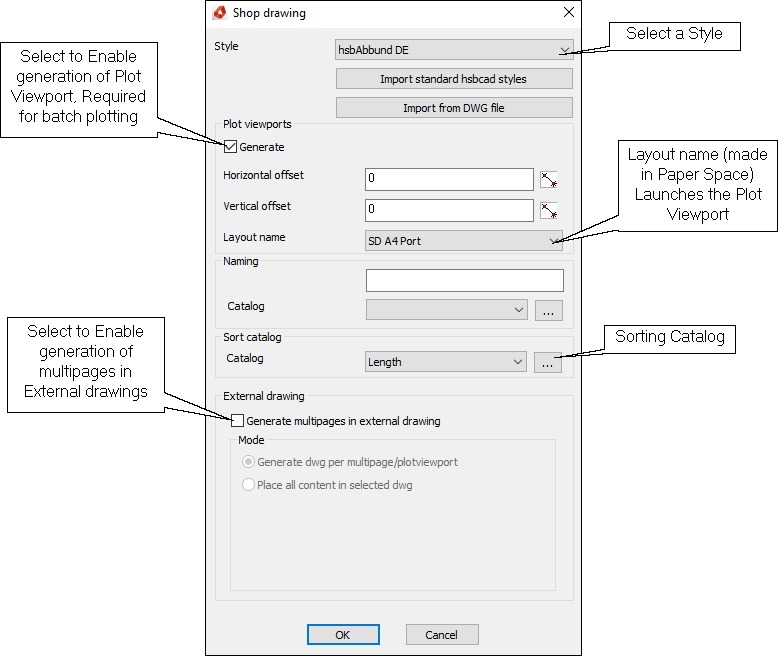
Select the entities (Type of Entity to select depends on the type of Multipage Style) you want to shop draw, then right click and pick a point in your drawing where you want your shop drawings to appear.
Style
- Select a style you want to work with. (In this case select hsbAbbund DE).
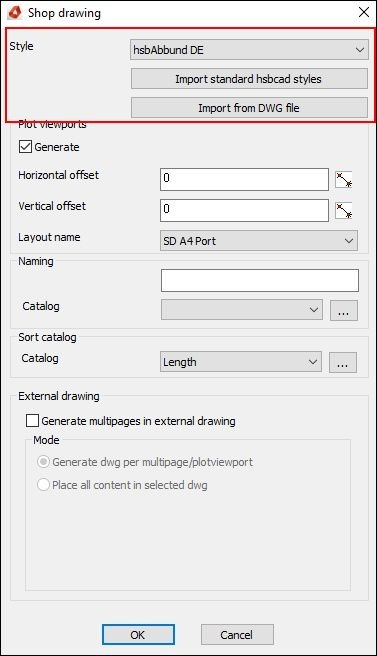
Import standard hsbcad styles – Select this if you want to import a new standard style, the ‘Import standard styles dialog box will appear, you can make your selection.
Import from DWG File – You can import a specific style from another drawing.
Plot viewports (Video)
Generate – Select this if you want to create shop drawings which can be batch plotted or viewed in specific viewport. (Make a separate Layout in paper space), the viewport placeholder which will be generated is dependent from the first viewport found in the designated layout.
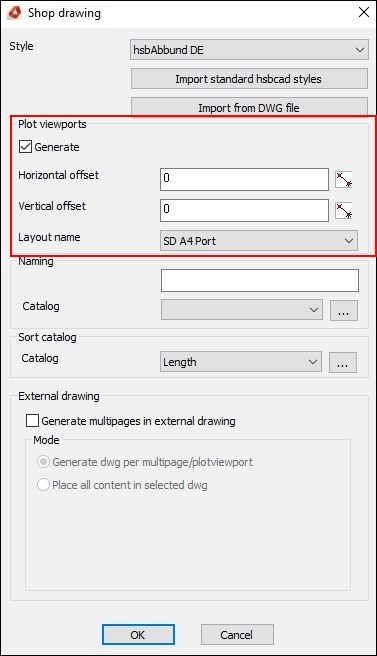
Horizontal Vertical offset – Enter a value for the horizontal and or the Vertical offset.Horizontal Vertical offsets control the placement of hsbcad Plot Viewports around Multipage Shop Drawings, however the hsbcad Plot Viewports can be moved or adjusted after insertion using standard AutoCAD commands.
Layout name – Select the layout (in your paper space environment) you want your drawings to fit in.This has to be made before hand. This layout needs to contain a valid AutoCAD viewport, the information (size & scale) from it will be used to create hsbcad Plot Viewports around each Multipage Shop Drawing.
Sort catalog
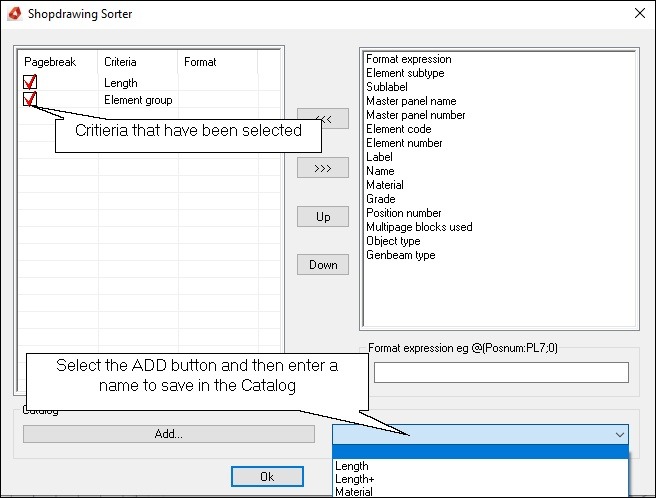
- Select the triple dots in the Shop drawing dialog box and the Shop drawing Sorter dialog box will appear.
- Select the criteria on the right hand side of the dialog box and move this to the left hand side of the dialog box by selecting the triple arrows
- Save this entry by selecting the ‘Add’ button, enter an appropriate name and select OK.
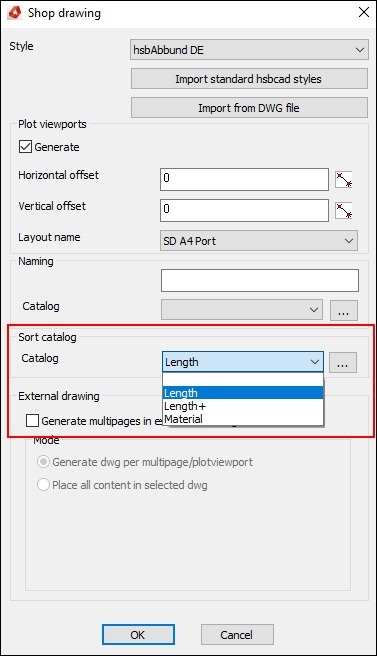
Catalog – You can sort your shop drawings according to a few criteria.
BLOCK_WARNING_START
IMPORTANT: When the Page break is selected you will get 1 length per shop draw viewport, if you don’t select page break you will get a continuous drawings in the shop draw viewport.
BLOCK__END
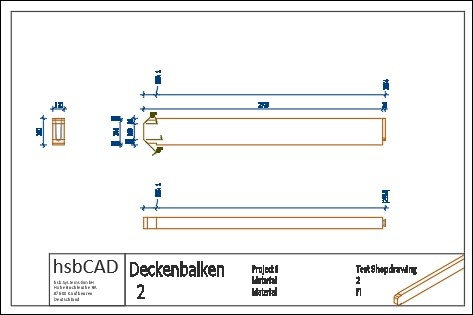
Select Ok and select the entities to shop draw, enter a point in your drawing you want your Shop drawings to appear.
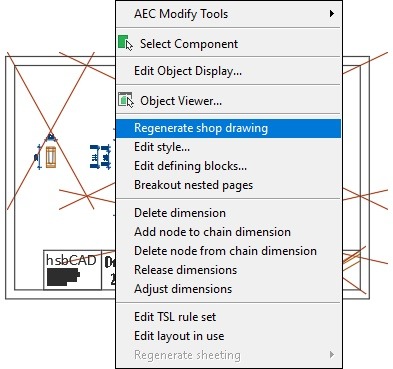
If entities are modified after the shop drawings have been created, the existing Shop Drawings will have red crosses drawn over then, you need to regenerate the shop drawing again. To do so select the Shop Drawing and right click and select Regenerate shop drawing.
External Drawing (How to creat an External Shop Drawing)
Shop Drawings can be created to an external drawing to keep the source drawing compact. If this option is activated the multipages are created in one selected drawing or per multipage.
