hsbShare | Configure your dashboard
Dashboard settings
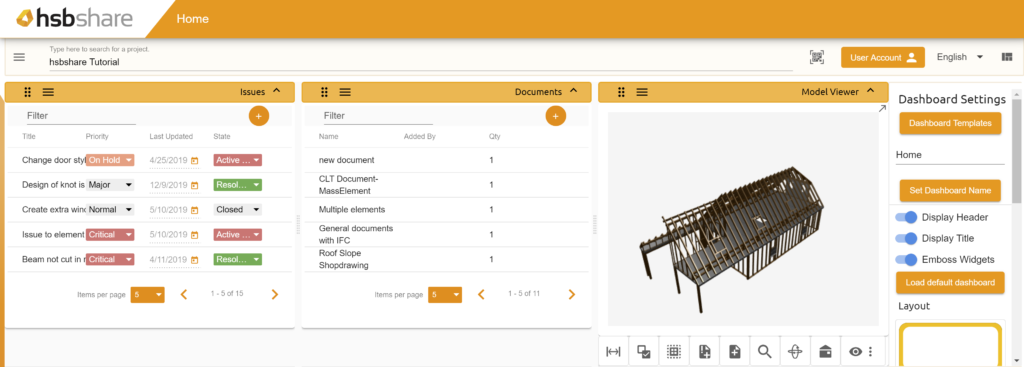
hsbshare has a menu where you can select one of a few predefined dashboard layouts. There are currently 7 different predefined layouts. You can also change the display of the title or the header of widgets.
How to access the dashboard settings and change dashboard layout
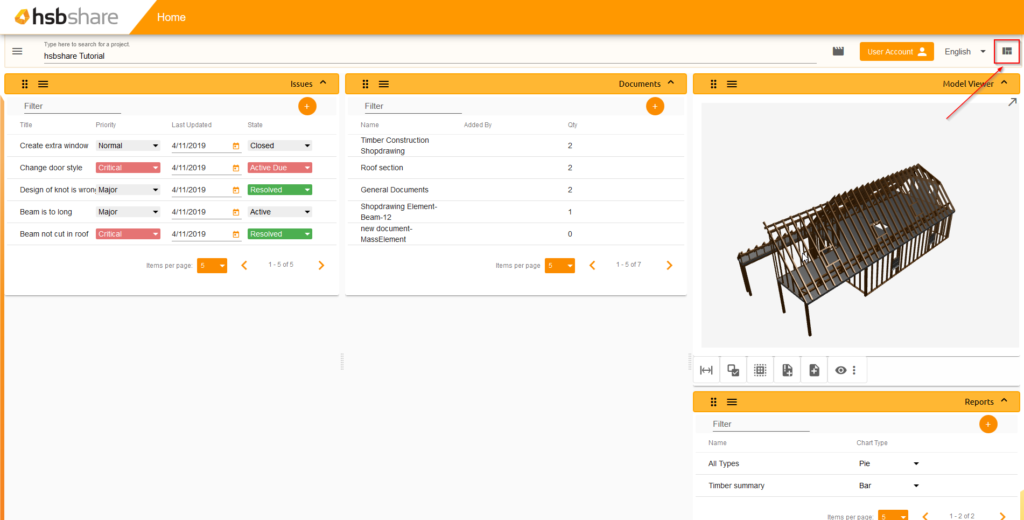
Step 1. Press this button to access the dashboard settings.
Step 2. Choose a dashboard template, change the name of your dashboard, select the desired dashboard layout or toggle to show the header and the title of the widget.
Widgets
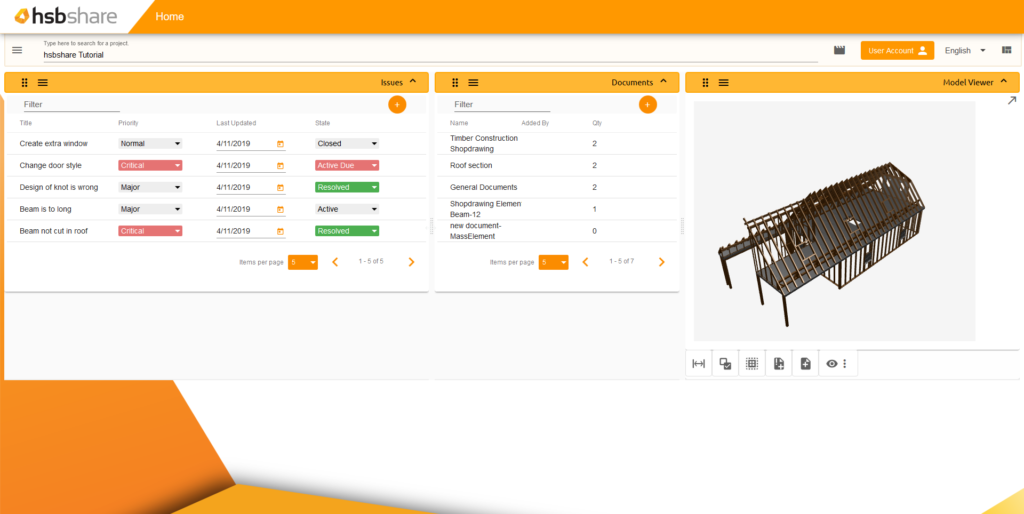
You can customize your dashboard how you want. You can add, move and delete widgets to your liking on your dashboard.
How to add a widget to your dashboard
Here is how to add a widget to your dashboard. There are two ways to add a widget.
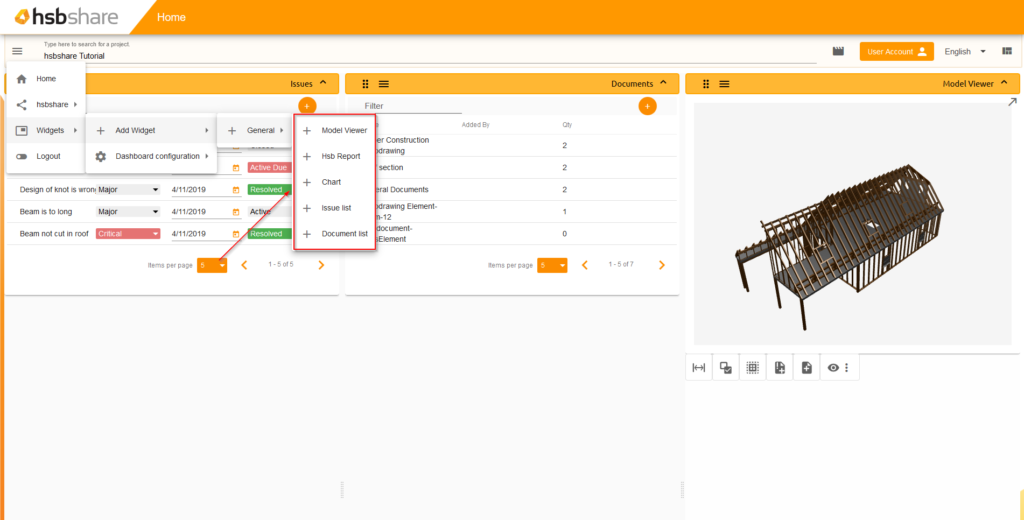
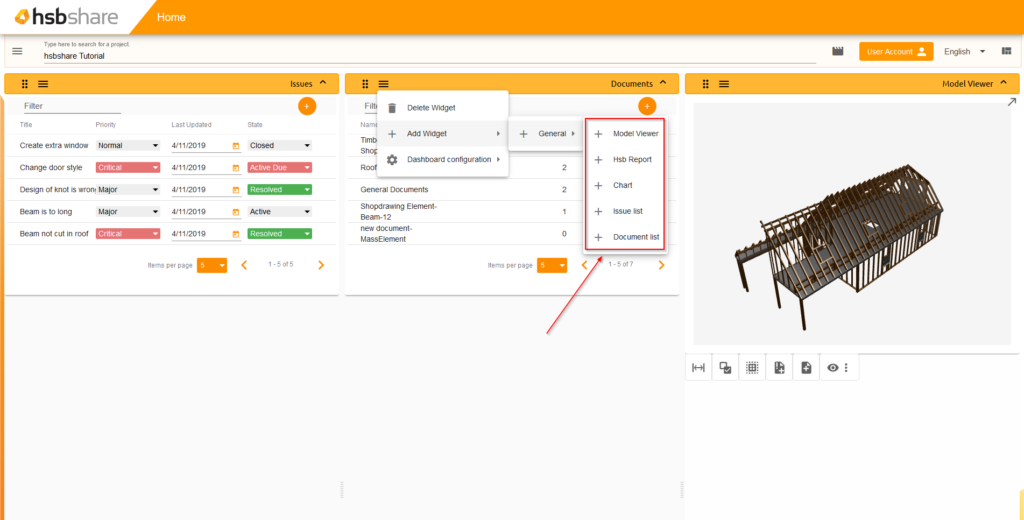
Step 1. Go to the menu in the top left corner or go to the menu button on the header of the widget.
Step 2. Go to Widgets -> Add Widget -> General and select a widget.
Step 3. The widget will be added and saved to your dashboard.
How to delete a widget from your dashboard
Here is how to delete a widget from your dashboard.
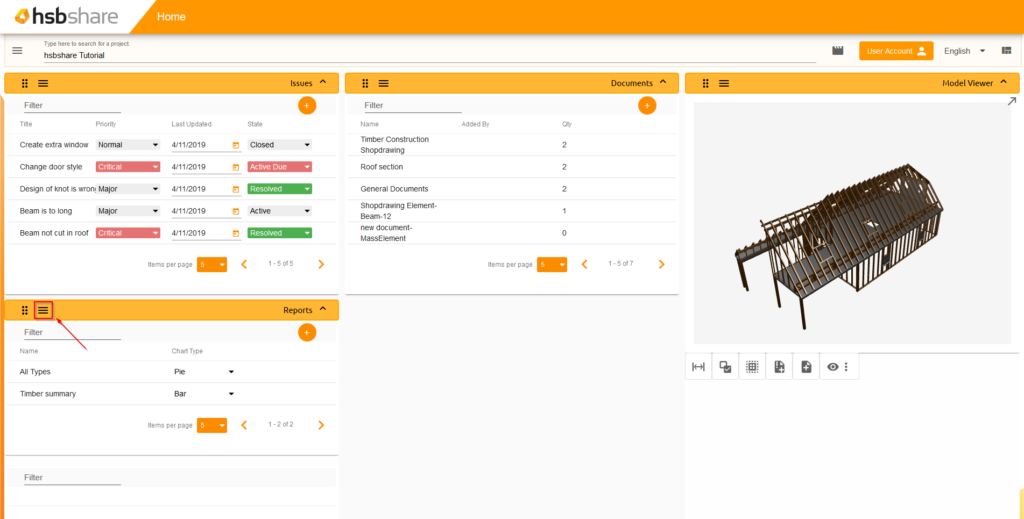
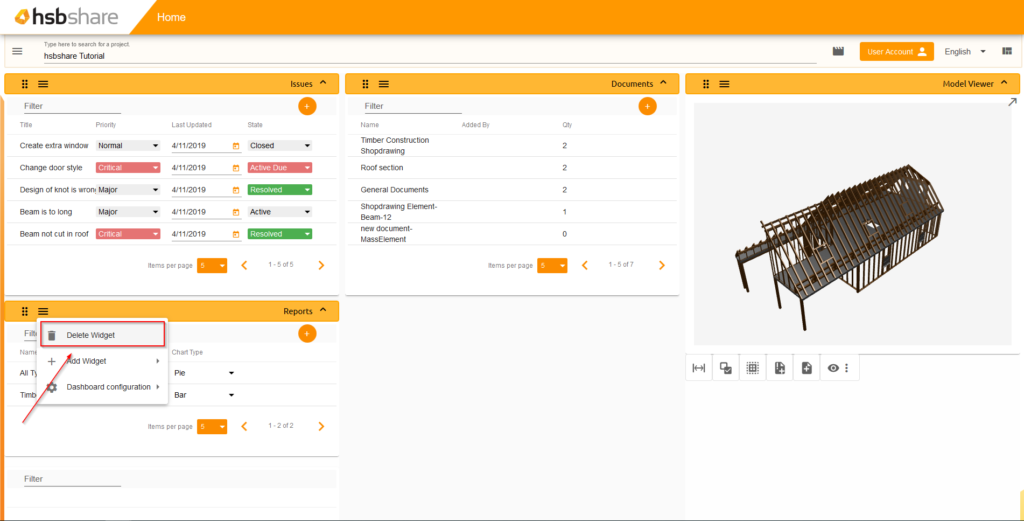
Step 1. Go to the menu button on the header of the widget you want to delete.
Step 2. Press Delete Widget and the widget will be deleted from the dashboard.
How to rearrange my dashboard
Here is how to rearrange your dashboard and move items on your dashboard.
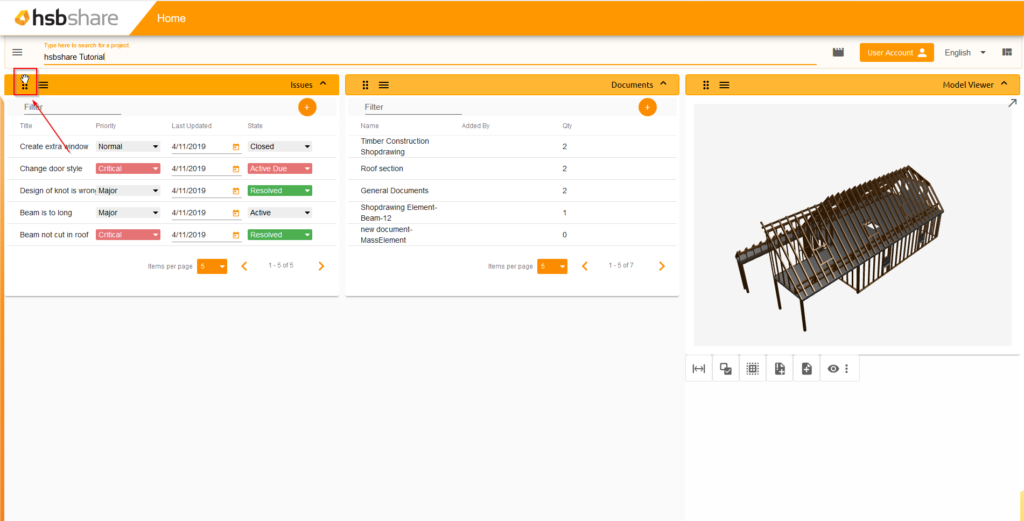
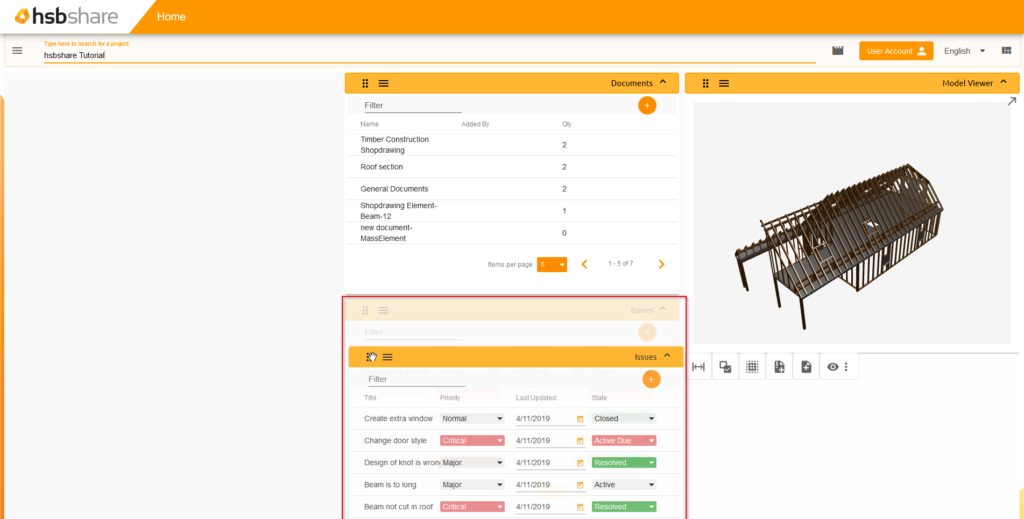
Step 1. Put your cursor on the 6 dots in the widget header and drag the widget to where ever you want to.
Step 2. Release the cursor and your widget will snap to the chosen place.
Columns
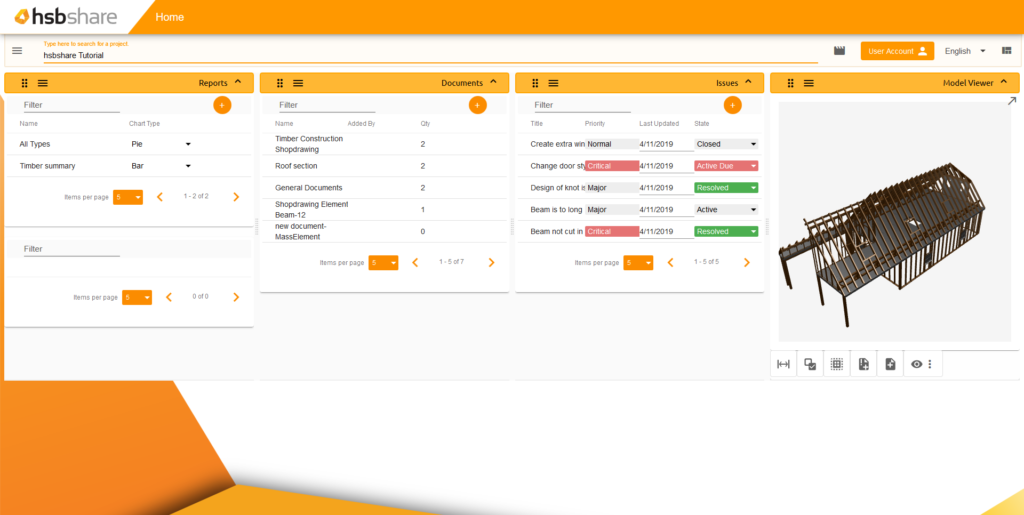
The dashboards of hsbshare consist of a number of columns. These columns can have different widgets in them. You can always add or subtract columns to the dashboard.
How to add or remove columns for the dashboard
Here is how to add or remove columns on the dashboard. There are two ways to add or delete these columns.
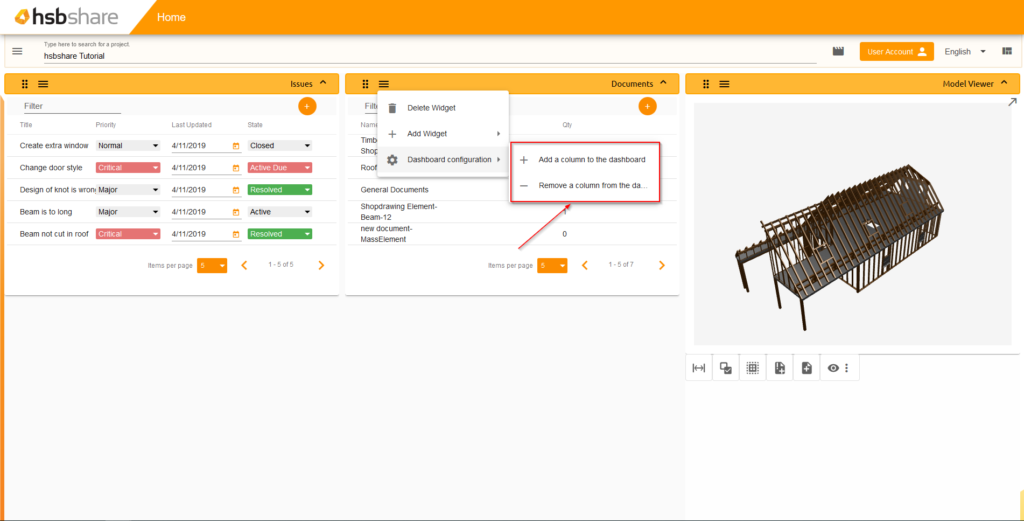
Step 1. Go to the menu in the top left corner or go to the menu button on the header of the widget.
Step 2. Go to Widgets -> Dashboard configuration.
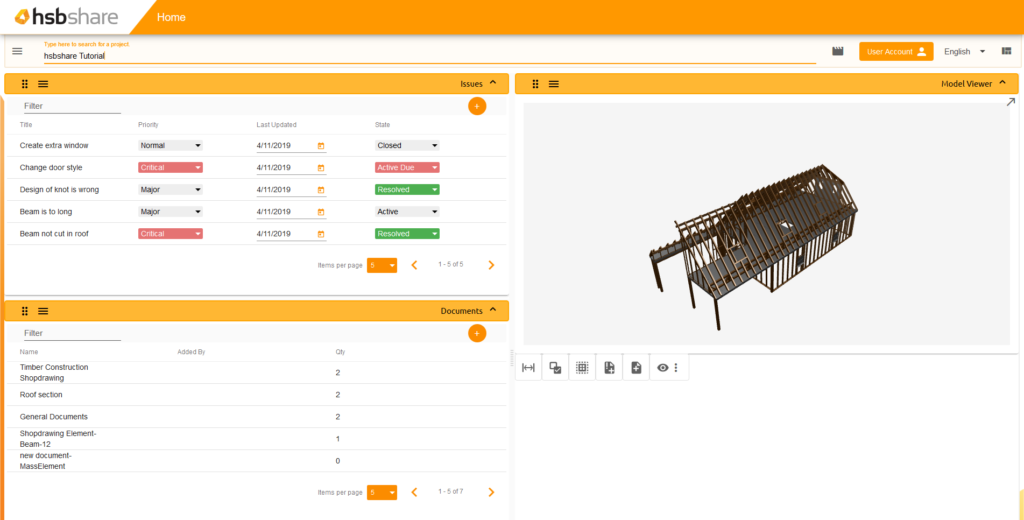
Step 3. Select if you want to add or remove a column to the dashboard.
Step 4. The result will look like this.
Change the size of your columns
Here is how to change the size of all the different columns in the dashboard.
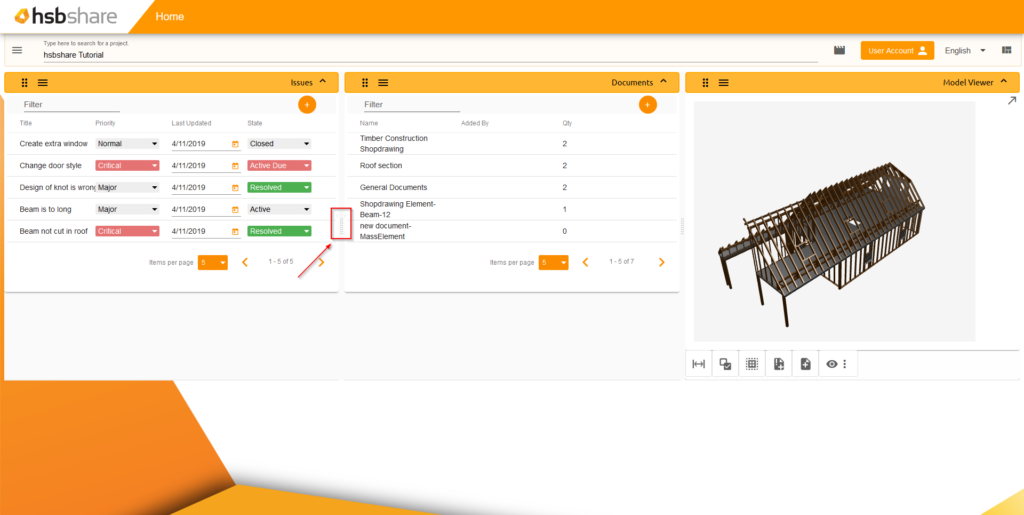
Step 1. Select the middle of the column, which is marked with an icon of 12 dots.
Step 2. Drag the icon to left or right to change the width of the column.


