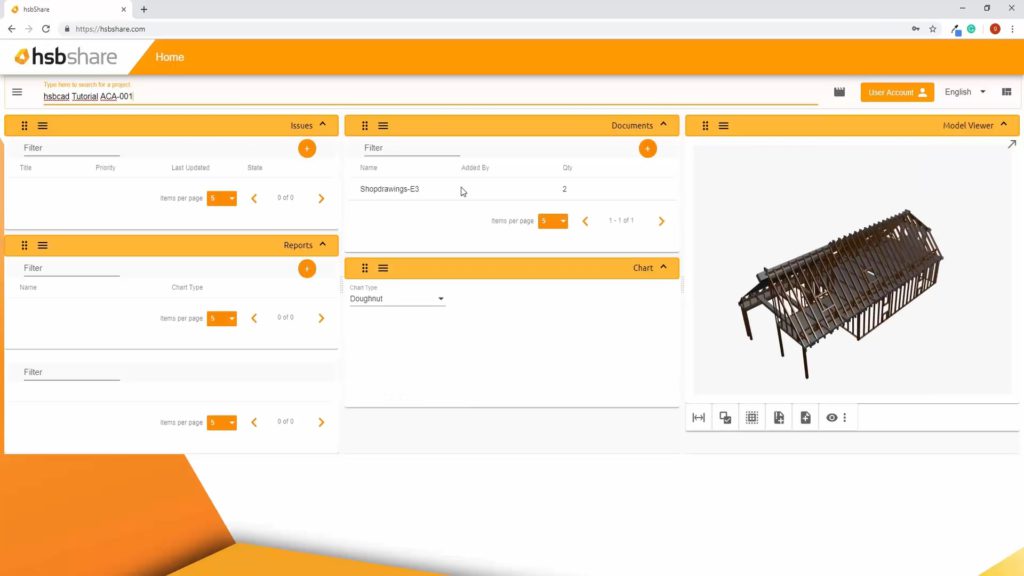
hsbShare | How to upload a project with documents to hsbshare
This document will show you how to upload a model from AutoCad Architecture to hsbshare using the Exporter.
You can also export a project with some documents attached.
How to use the exporter to push a model to hsbshare
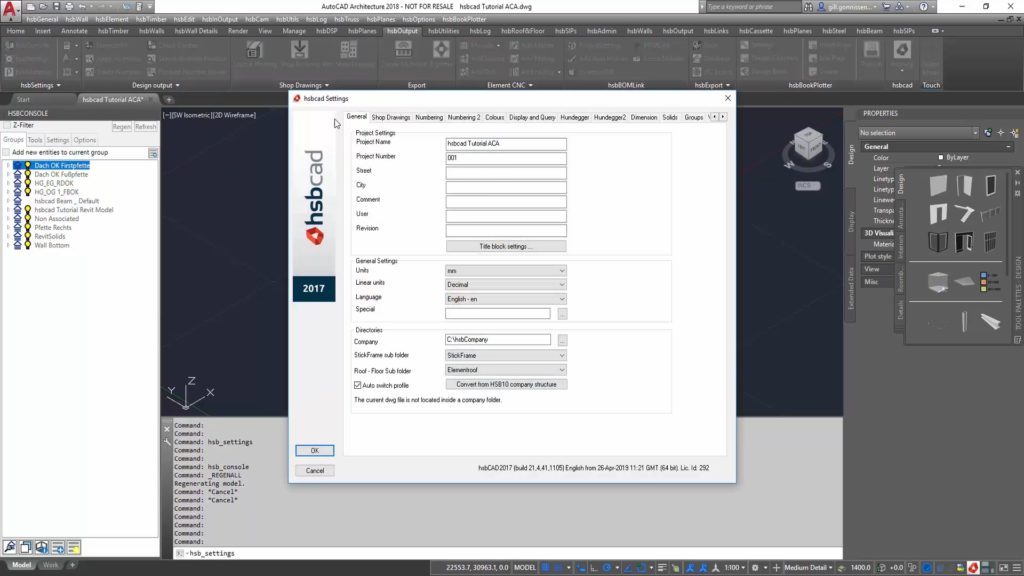
Step 1. Open the hsbSettings, here you have an option to change the Project name and the Project Number. (This will be used for Exporter Settings).
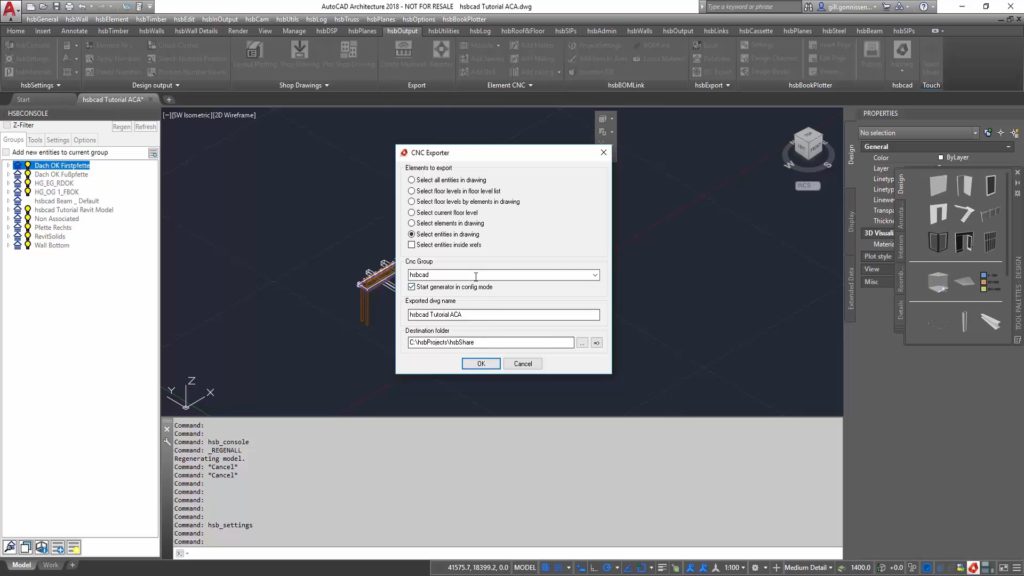
Step 2. Open the Exporter and choose what Elements to export. After that, press ok and select the Elements.
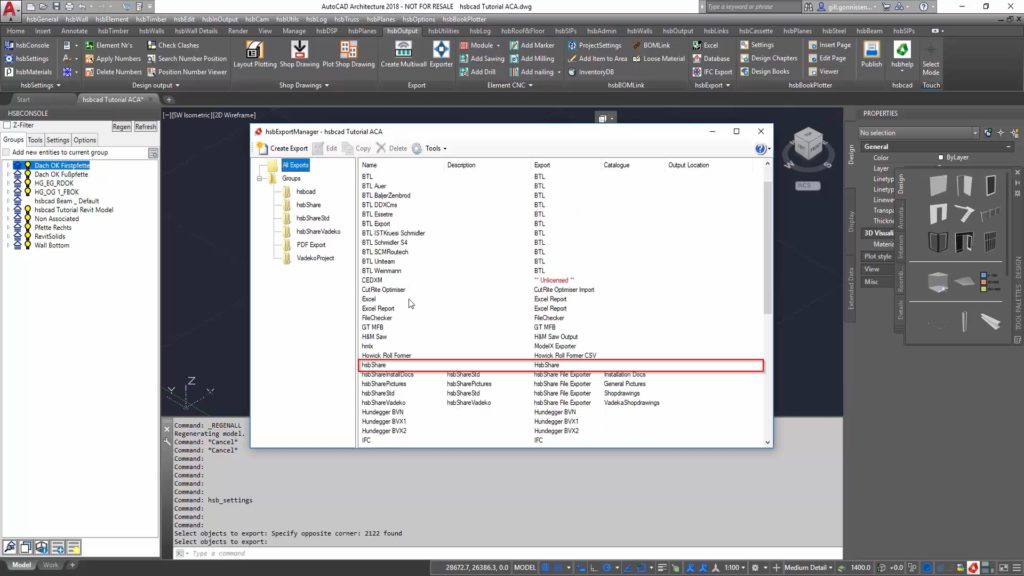
Step 3. Go to the hsbShare exporter and modify its properties.
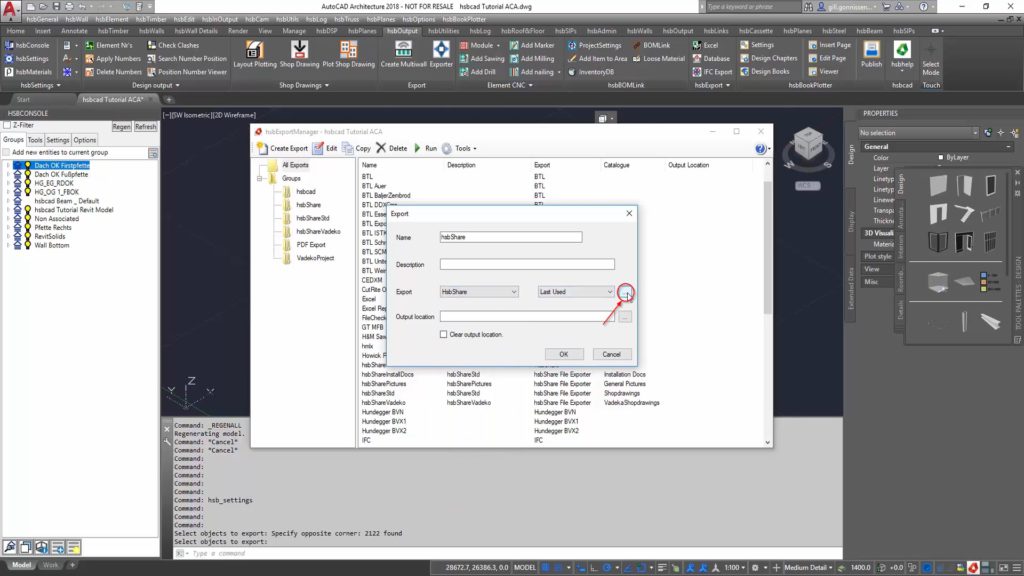
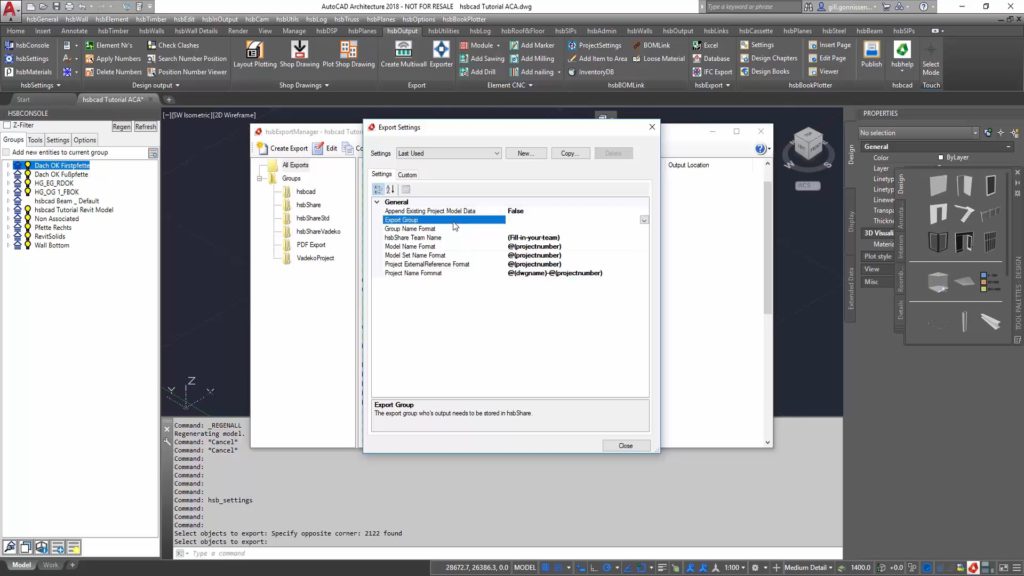
Append Existing Project Model DataCheck this option to create additional Set and Model for any existing Projects.Export groupThe export group that needs to be stored in hsbShare.Group Name FormatThis can always stay empty as it is used by other applications.hsbShare Team NameHere you can fill in your team name that will be linked to the project which will be pushed to hsbShare.Model Name FormatUsed by hsbShare internally.Model Set Name FormatUsed by hsbShare internally.Project ExternalRefrence FormatUsed by hsbShare internally.Project Name FormatThe name of the Project in hsbShare.
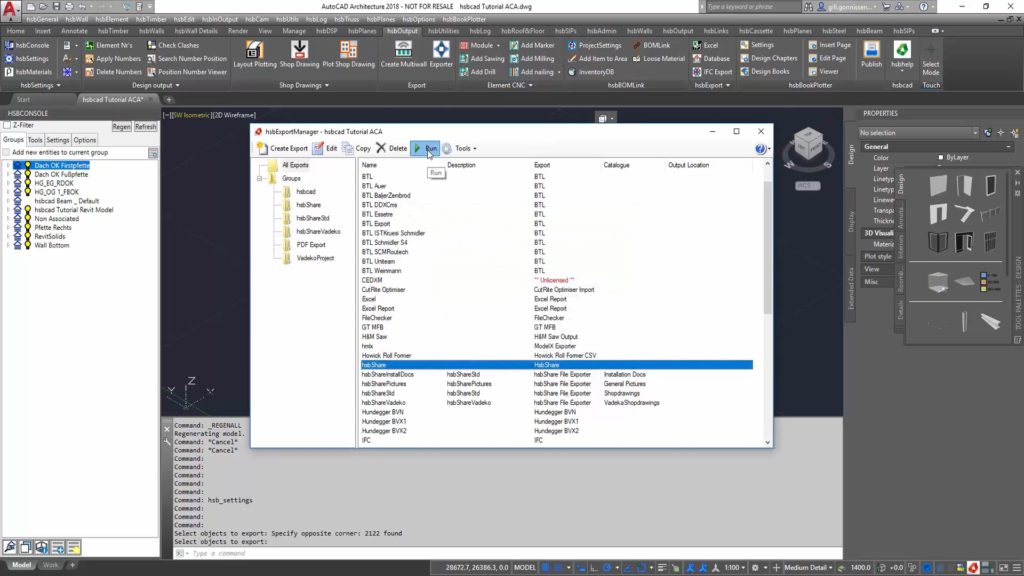
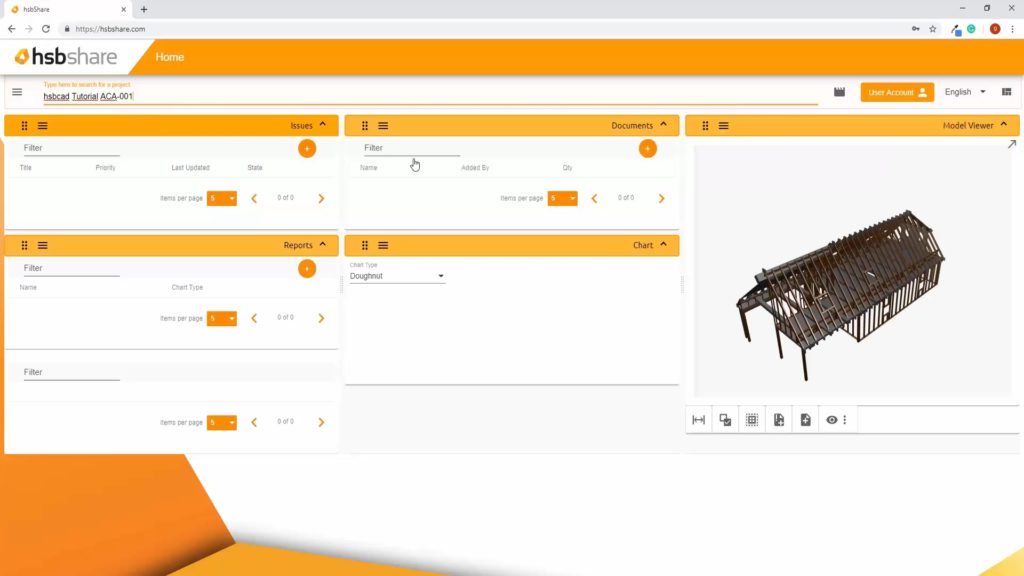
Step 4. Run the exporter "hsbShare" and it will be pushed to hsbShare.
How to use the exporter to push a model with linked documents to hsbshare
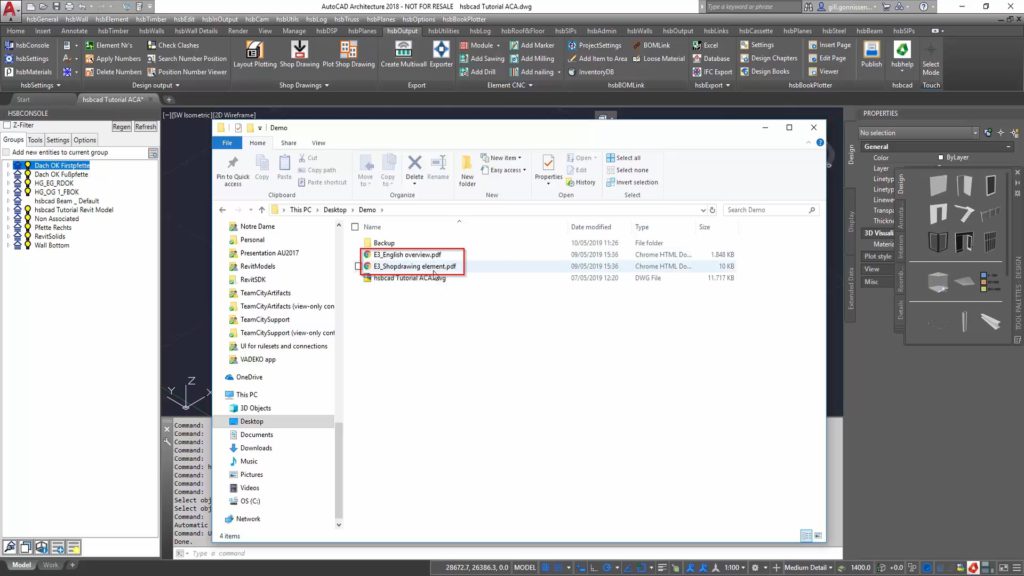
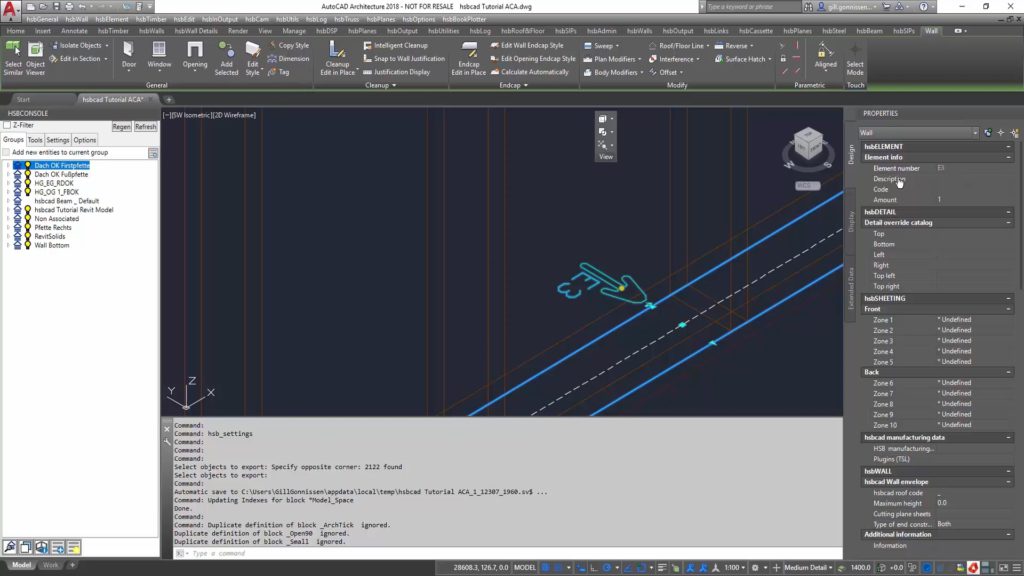
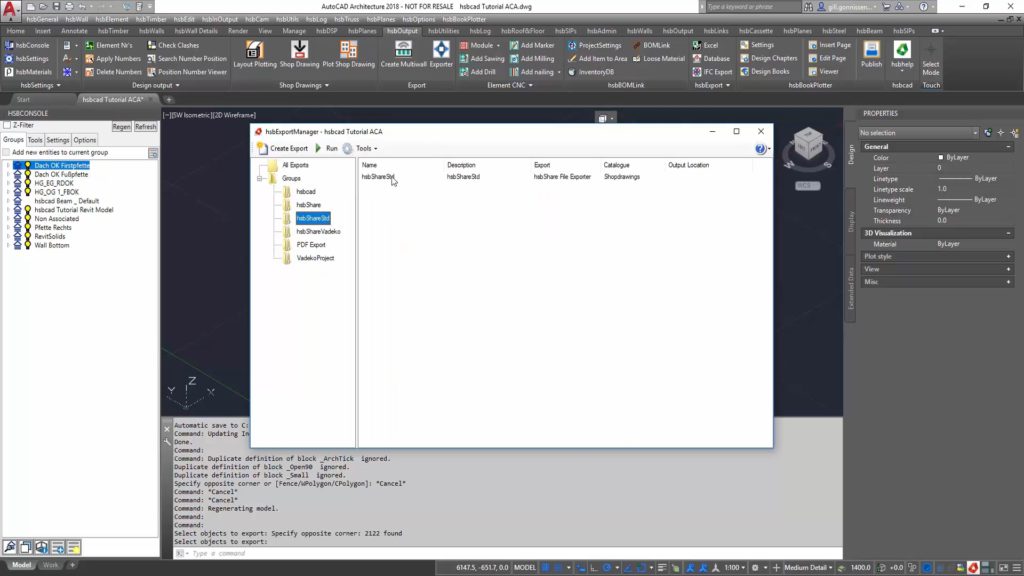
Step 1. Open the Exporter and choose what Elements to export. After that, press ok and select the Elements. The export manager will open up.

Step 2. Now you can configure the hsbshare standard group. Here, you need to select "hsbShare File Exporter" and for this example select "Shopdrawings".
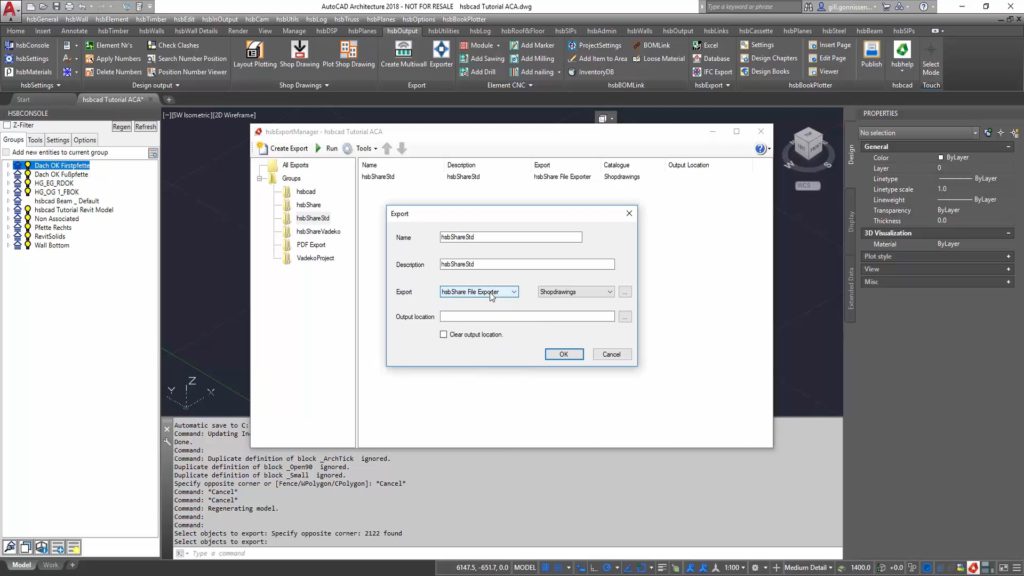
Step 3. After this, you can select and modify its properties.
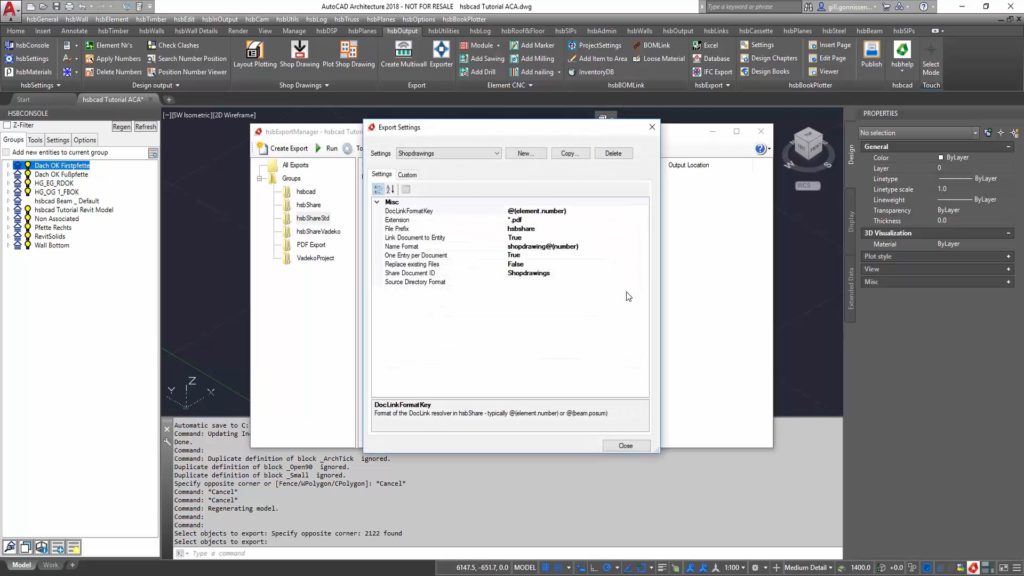
DocLinkFormatKeyThe key on which the document gets connected. This is typically @(element.number) or @(beam.posnum).ExtensionSpecifies the extension of the files to process.File PrefixUse this if you want to filter files that start with a certain word.Link Document to EntityChoose if you want to link the document to an entity or not.Name FormatThe name of the document in hsbShare.One entry per DocumentTo create one hsbShare Document entry per Document.Replace existing filesReplace existing files that are already present.Share Document IDName of the document entry in hsbShare.Source Directory FormatThe folder in which it will look for documents. When left blank, the project directory will be used.
Step 4. After that, close the dialog by pressing ok and go back to All Exports.
Select the hsbShare export and modify its properties.

Step 5. Select the Export Group and select the just created or modified Export Group "hsbShare Standard'.
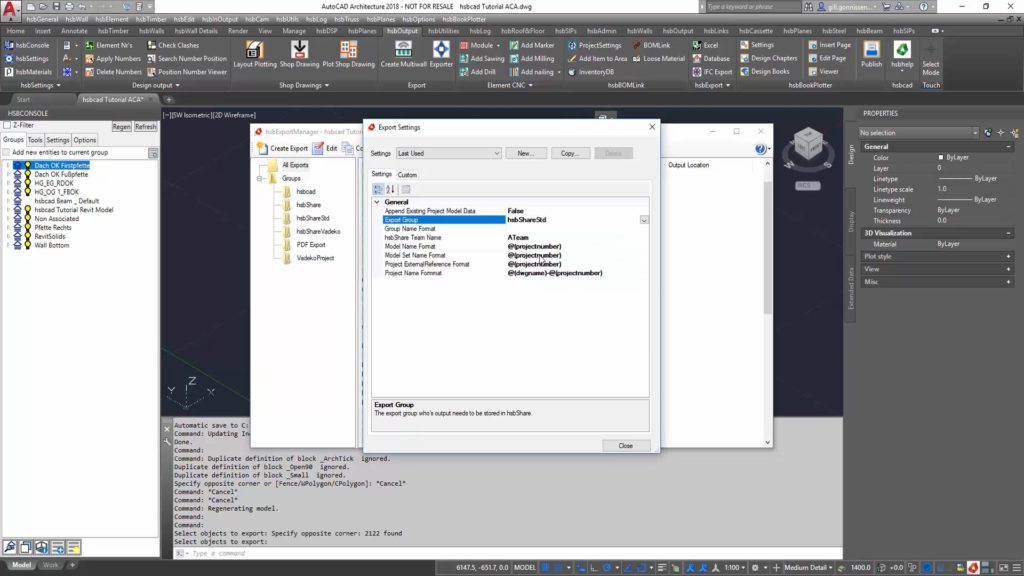
Step 6. Modify the rest of the properties and run the export.
BLOCK_INFO_START
It will run the hsbshare export and automatically run the "hsbShare Standard" export group.
The documents and the model will be pushed to hsbShare and the documents will be attatched.
BLOCK__END
