Jump to section
Can’t find the answer you’re looking for? Don’t worry we’re here to help!
Contact supporthsbShare | Upload project to hsbshare with the exporter
Set your settings
Set the Project settings by clicking project settings on the ribbon or activate the command hsb_settings in the Autocad commandbar.
BLOCK_INFO_START
Before you start exporting don’t forget to number all your entities. More information about numbering entities can be found in the article: Add numbering.
BLOCK__END
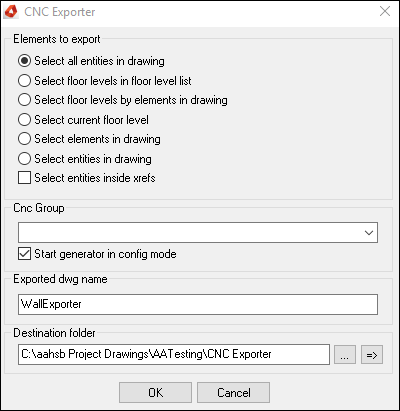
Select the option hsbCAM\Element export\CNC Exporter.

OR select the CNC exporter in the Ribbon

This will open the CNC Exporter dialog box.
CNC Exporter
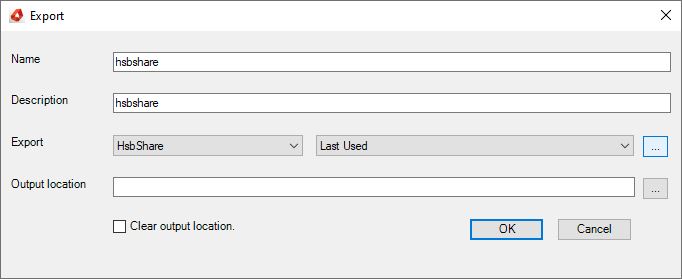
After running the CNC exporter command, the ExportManager dialog will open. Here you can create new exports.

After selecting the Create Export button the Export dialog box will appear. Fill a desired name and description. As Export choose Hsb Share.
Settings for the hsbshare export
Export Group: Allows you to fire an export group after this export has been completed.
Group Name Format: In order to use this export you will need to receive a Group Name from the hsbcad team.
hsbshare Team Name: the value to what team a project gets pushed. This is your team in hsbshare.
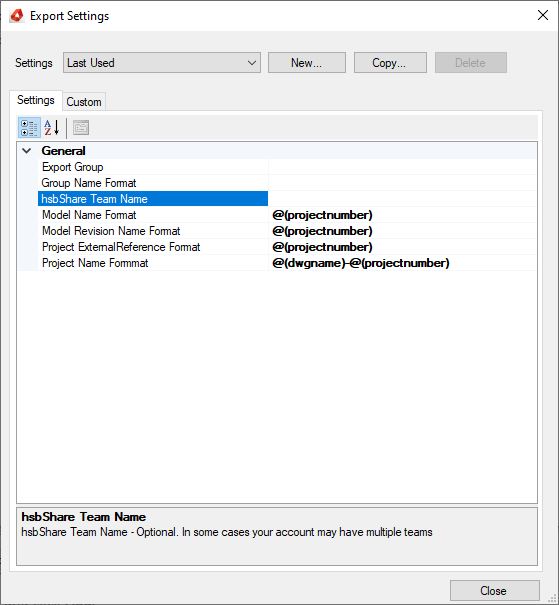
For the next 4 properties, you can use a parameter to set your property. In the example, the parameter "projectnumber" will be taken. This is the same parameter that is inside your hsbsettings.
BLOCK_INFO_START
Nameformatting can be used for different parameters. See Data Formatting in the Exporter for more information.
BLOCK__END
Model Name Format: The name for your model.
Model Set Name Format: The name for your set.
Project ExternalReference Format: In general not used, but this is being used for the hsbLogistics application.
Project Name Format: The name for your project. This will be your name where you will search for in the hsbshare search.
Run the exporter and fill in your hsbShare login information. This will result in your model being pushed to the cloud.
The export status will pop up and show the export log.
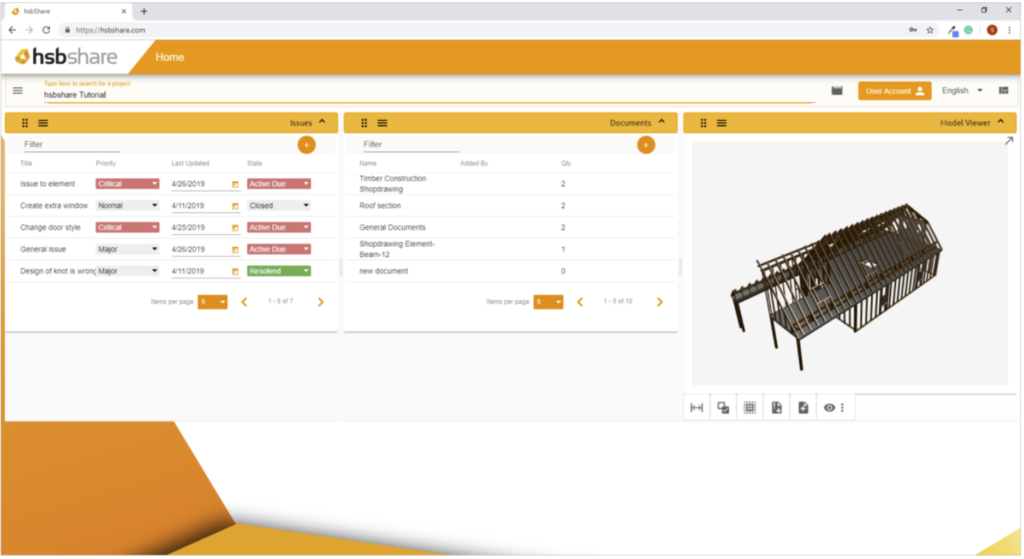
The hsbshare environment
Go to www.hsbshare.com and login to your account. The uploaded model will be listed with the project format name chosen in the export settings.