Essential Guide to Revit® | Exporter (video)

hsbcad Exporter
The hsbcad Exporter is used to sends an hsbcad model to the hsbcad export manager.
Insert
- Select the command.
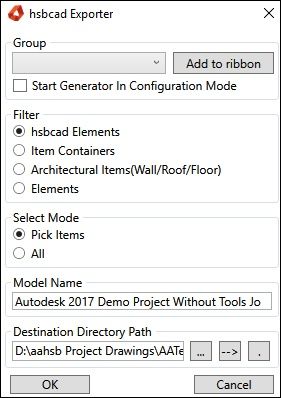
This will open the hsbcad Exporter dialog box.Select a Group you have made previously (if you haven't made a group before go to How to create a Export/Group
- Select any options in the Filter.
- Select OK.
The export file(s) will be saved in the Destination folder.

Group
Start Generator in Configuration Mode - When you select this it will open in the Export Manager.
Filter
hsbcad Elements - Are Elements with hsbcad intelligence.
Item Containers - This is a group of Elements.
Architectural Items (Wall/Roof/Floor) - These are all the Architectural items.
Elements - These are all Revit Elements.
Model Name
Give a name to the file you want to save.
Destination Directory Path:
The file will be saved at the destination directory you have selected (default it will be stored in the folder where the drawing is situated)
How to create an Export Group
- Select hsbcad Exporter in the Ribbon.
This will open the hsbcad Exporter dialog box.

- Select the Start Generator in Configuration Mode (this will open the Export Manager)
- Select OK.
The ExportManager dialog box has opened.
Now we need to create an export, select the Create Export button.

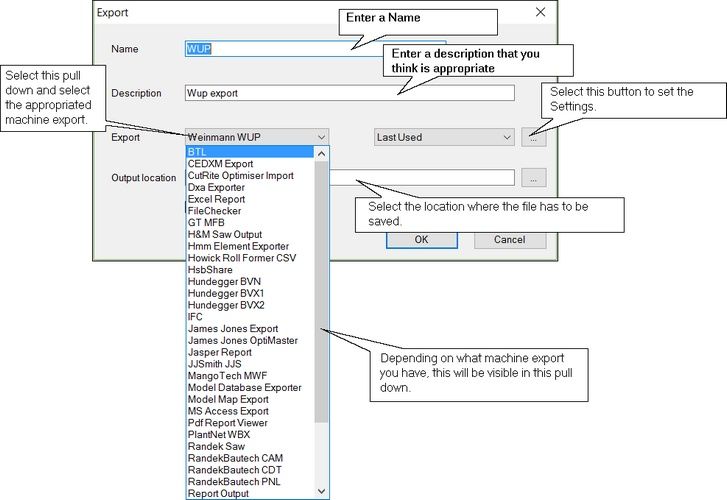
The Export dialog box will appear.
- Fill in all the necessary information and select OK.

Name – Enter a name for the project.
Description – Enter a description for the project.
Export (pull down menu) – Select a machine to export to.
Last Used (pull down menu) – Catalog Entry (More explanation in Export_Settings>Export Settings)
Output location – Select the destination folder by selecting the triple dots (default it will be stored in the folder where the drawing is located)
Clear output location - This clears the whole folder.
Once you have created an export we now need to Create a group.

- Right click the word Groups on the left hand side of this screen and select Create Group.

- Give this Group a name, we have called it WUP (example)

Now we need to add the WUP (example) settings to this group.
- Add your WUP Settings to this Group by right clicking the Name (WUP) and select Add to/BTL (this is the group name you have just created).

In the hsbExportManager you can Edit/Copy/Delete Exports and import settings, more on this in the Export Manager Chapter.
Edit hsbExport Commands
How to Exchange the Revit Model to Autocad (Video)

