Essential Guide to Using layouts
What kind of information can be viewed in layouts
The function of this document is to provide information on how to use hsbLayouts to View elements.
Add text/dimensions to elements and print element information.
In the hsbLayouts we can view the element Beams, Sheets and their associated information (text, dimensions etc.).
What information can be added to elements
You can add text and dimension information to elements.
Viewing layouts
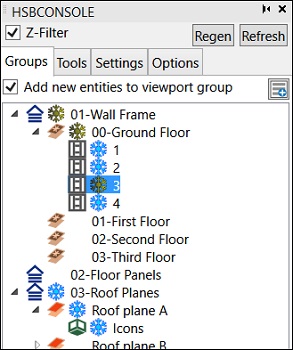
Before you can view an element in a layout, the element has to be generated and the viewport has to have hsb settings applied to it. To view the element in the layout, right click the element in the console and select ‘’Set viewports in layout’’. The viewports are now updated to show the information on the selected element.
Adding text to individual elements
Text can be added to elements through floating model space, you add text in floating model space because it is easier to place the text as you only see the element and not all elements.
Step 1. To add the text to an element, firstly right click on the element in the console and select Set Viewports in layout.
Step 2. To place the text in a viewport (floating model space), double-click inside the viewport with the left mouse button.
Before you add text, make sure that the element is set current and that Add new entities to viewport group is switched on.
Step 3. Now add text inside the viewport using Autocad text commands.
To make sure you see the text when you print out the viewport, turn on info in the layers section of the hsb Viewport Settings.
Adding dimensions to individual elements
If you want to add a dimension to an element, use the following procedure. Bear in mind that most dimensions are not drawn but instead created automatically through TSL’s (Stud dimensions, Opening dimensions etc.). Dimensions can be added to elements through Floating Model Space, you add dimensions in floating model space because it is easier to place the dimension as you only see the element and not all elements.
Step 1. To add the dimension to an element, firstly right click on the element in the console and select Set Viewports In Layout.
Step 2. To place the dimension in a viewport (Floating Model Space), double-click inside the viewport with the left mouse button.
Before you add a dimension, make sure that the element is set current and that ''Add new entities to viewport group'' is switched on.
Step 3. Now add dimensions inside the viewport using Autocad dimension commands.
Step 4. To make sure you see the dimensions when you print out the viewport, turn on dimension in the layers section of the hsb Viewport Settings.

Printing layouts
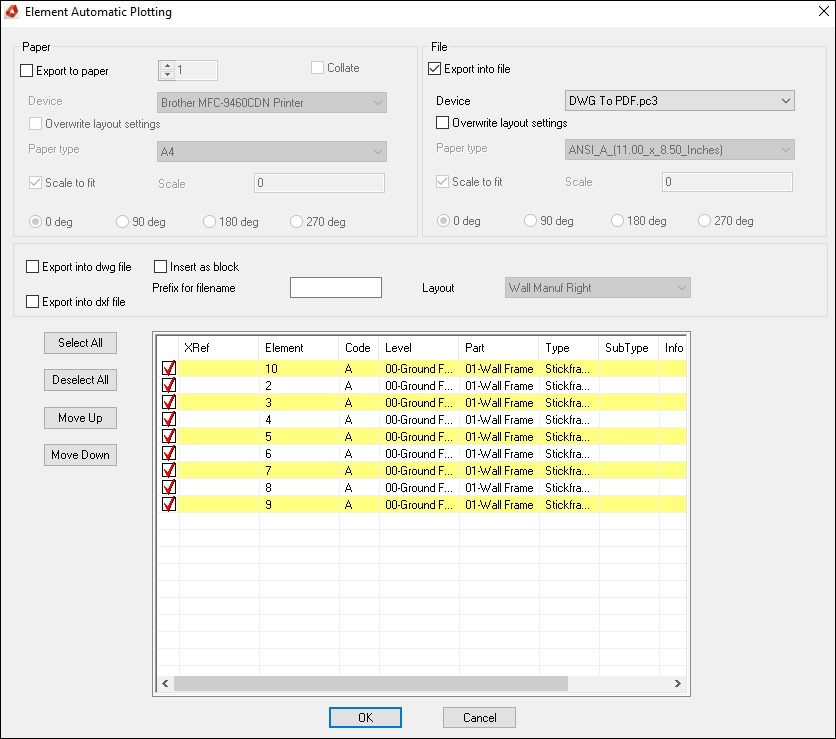
To assist in the printing of layouts you can use the hsb Automatic Plotting.
Step 1. Select hsbInOutput\Automatic Layout Plotting.
Step 2. Select the elements that you want to plot. Pick on the column headings to sort your elements by element name, type, floor etc.
Step 3. Select the elements to be plotted by double clicking on the elements checkbox and check it for any elements to be plotted.


