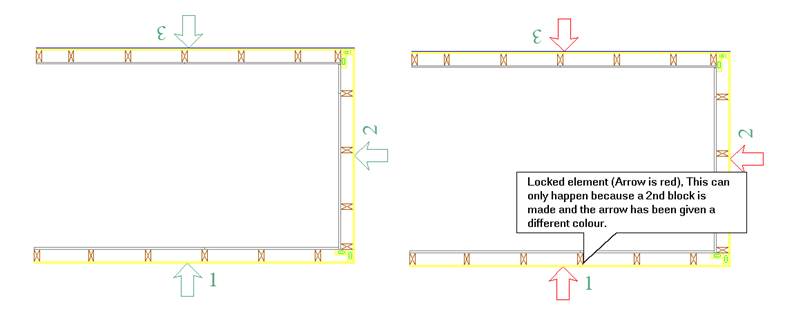
How to customize the hsbWall Icon (Video)
This document with video will show you how to customize the hsbWall Icon of a Wall and how to change the text and Wall arrow size
How to change a Custom made Wall Icon in the Style Manager (Video)
How to Customize text opening parameters (Video)
How to control the Wall icon text size
Wall stick frame module Tab
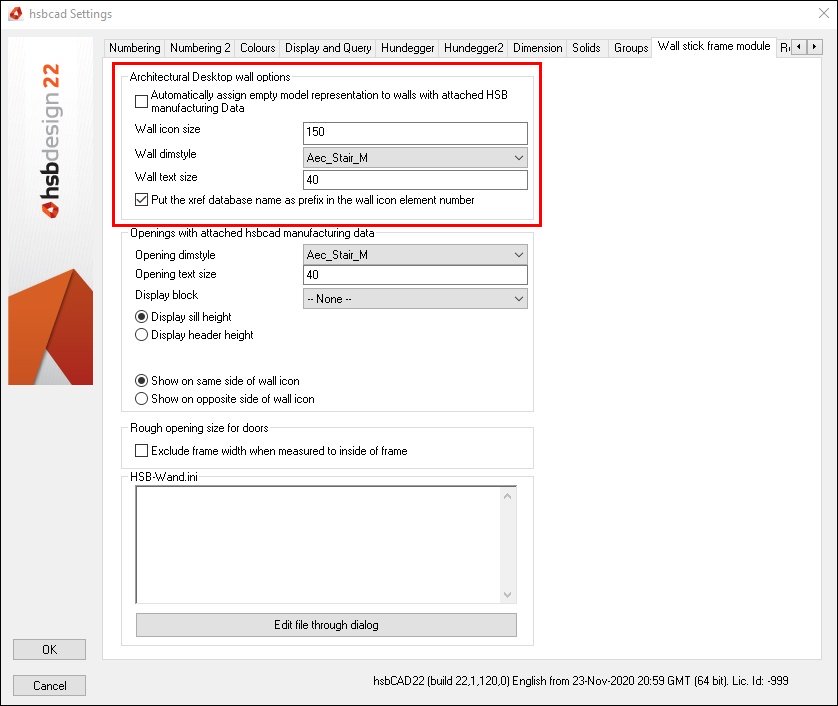
This can be found in thehsbGeneral\hsbSettings\ Wall stick frame module tab, it controls the output of the Wall stick frame module.
Architectural Desktop wall options
Automatically assign empty model representation to wall with attached HSB manufacturing Data.
- Select this if you want to switch off the ACA wall envelope.
Wall icon size – Enter the value of the Wall icon size.
Wall dim style – Enter the name of the Dim style.
Wall text size – Enter the value of the text size.
How to Customize the Wall Icon
BLOCK_WARNING_START
Attention: This only works with ACA (because you need the Style manager to do this) You have ways of customizing your own arrow or even eliminate the arrow by using a block.
BLOCK__END
How is this done?
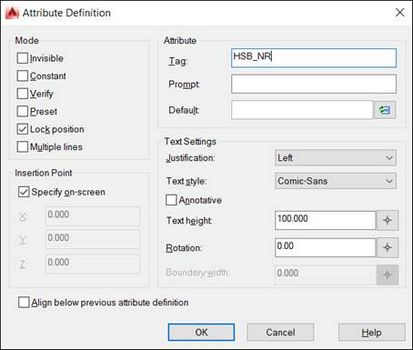
Type ATTDEF in the command line, the Attribute definition dialog box will open.
In this example we have used the a name HSB_NR in the Tag text box,
- select OK.
BLOCK_INFO_START
Note: You have 5 options,
Wall number (HSB_NR),
Wall Code (HSB_CODE),
HSB_XREFNAME,
HSB_NRWITHXREF,
HSB_ELEMENTINFORMATION
BLOCK__END
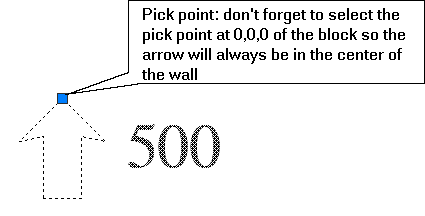
We have also drawn an arrow with a polyline.
Once you have placed the HSB_NR attribute text and your arrow in your drawing you need to make a block of this.

- Type Block in your command line, the block definition dialog box will open.
- Enter a name for your Block (I have entered number)
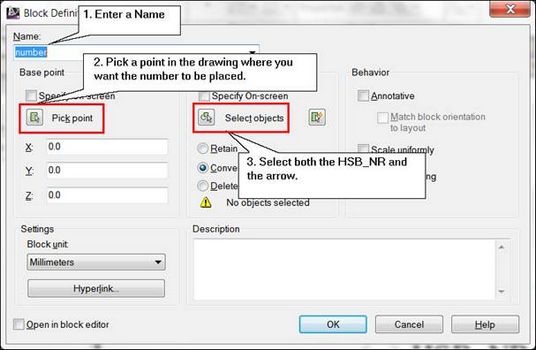
- Pick a point in your drawing
- Select the arrow and the text (in this case the HSB_NR)
- Select OK.
- Enter a value and select OK.
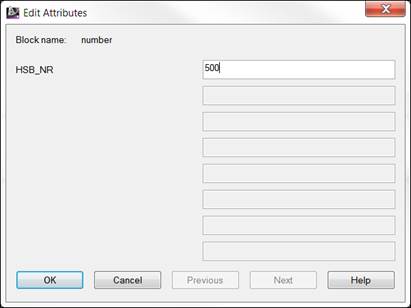

Your block has now changed.
To attach this to each wall we need to make changes in the Style Manager.
We need to attach this block to the Wall style.
- Select the Style Manager\Architectural Objects\Wall styles and select the style that you want to attach it to.
- Select the hsbcad data tab and then select the 2 pull downs and scroll to the block name you want to change it into. In this case it’s number.
BLOCK_INFO_START
Note: Whenever you make changes to the block in the future it will not refresh itself in an existing drawing you need to select another block in these pulldown menus and select apply
and then go back to your original block.
BLOCK__END
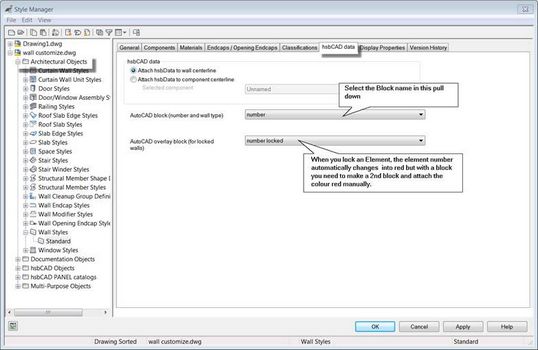
When you draw walls they will all look like this after generation.
