How to edit walls
This document will show you how to Edit hsbWalls.
Why edit walls
When you create a wall, the wall may not always appear in the way you want it to. The wall can be edited in most cases by either using the hsbWall drop down menu or by selecting the Wall and right clicking on the mouse to activate the hsbEdit tools for editing the wall.
Flip wall arrow
A wall is made up of zones. Zone 0 is where the studs are, on one side of the studs you have sheet zones 1-5 and on the other side sheet zones 6-10.
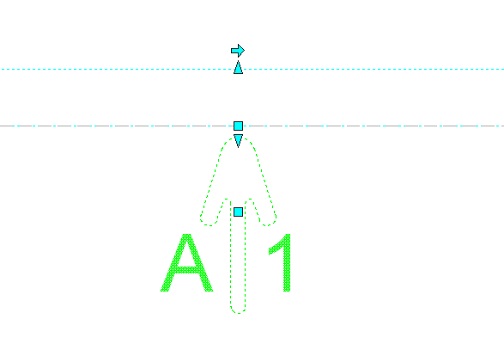
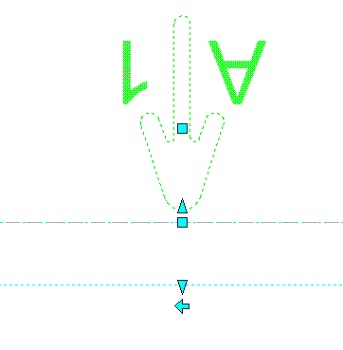
The arrow for the wall will always be on the side where you have sheet zones 1-5. Sheet zones 1-5 are normally on the outside of the building.
There may be times when the arrow is on the wrong side of the wall.
You may have drawn a wall and the outside of the wall is the inside of the house and this needs to be reversed by yourself.
To reverse the wall you need to flip the wall arrow, you can do it in 3 ways.
- Select hsbWALL\Flip the wall arrow and select the wall(s) that you want to flip; the arrow will flip to the other side.
- Select the wall(s) that you want to flip; ‘right click’ the mouse and select Flip Arrow.
If you only want to flip the arrow of only one wall, you can select the wall, the wall will be highlighted with grips.
Click on the arrow grip to flip the wall arrow.
Move wall arrow
Arrow sometimes the wall arrow may not be positioned in a suitable place and may need to be moved to a more suitable location where it is not overlapping other important information.
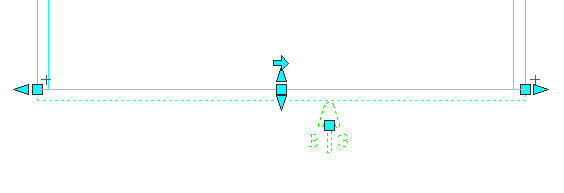
To move the arrow, select the wall and the walls grips will be highlighted.
Click on the grip placed on the wall arrow and move it with the mouse.
BLOCK_INFO_START
If you are using stud distribution 12(start on icon) the stud placement will be affected by moving the wall arrow.
BLOCK__END
Resize wall arrow
You may want to make the wall icon a different size so that it is clearly visible for viewing and printing.
To resize the wall arrows select hsbGeneral\hsbSettings\Wall stick frame module. Beside wall icon size enter a height for the arrow.
The arrow height is the height from the base to top of the arrow in AutoCAD units.

Split wall length
When you create walls there will be times when the wall that you have created is longer than the longest manufactured wall.
You will therefore need to split the wall so that it becomes two separate walls.
To split the wall, there are two ways to execute the command.
- Select hsbWall\Split Wall Length, when prompted, select a wall to be split and then pick a point on the wall where you want it to be split.
Your wall will now be split in two with the new wall getting the next available number.
- The second method is to select the wall and ‘right click’ and from the menu select Split. Now pick a point on the wall and your wall will be split at this point.
Splitting more precisely
When splitting the wall length you can locate a splitting point more accurately by using Object Snap Tracking if you want the wall split to be at a set distance from an Object Snap.
To use Object Snap Tracking, make sure that OSNAP and OTRACK are switched on.

When prompted to pick the splitting point, move the crosshairs inside the endpoint object snap, then move the crosshairs outside the endpoint object snap in the direction of where the wall split is going to be and type the distance from the endpoint to where the split is to be.

BLOCK_INFO_START
When splitting a wall you might find it easier to select a point if you delete construction.
BLOCK__END
Split wall height
The split wall height command is used where you want to create multiple floors on a building.
To use this command you will have to have some walls already drawn. E.g. you have the ground floor walls drawn and you want to create a second floor.
To use the command, select hsbWALL\Split Wall Height.
In the Divide Floors dialog you can select:
- Add new level.
- Remove level.
- Edit level.

Add new level
When you select Add New level, the Level info dialog box will open.
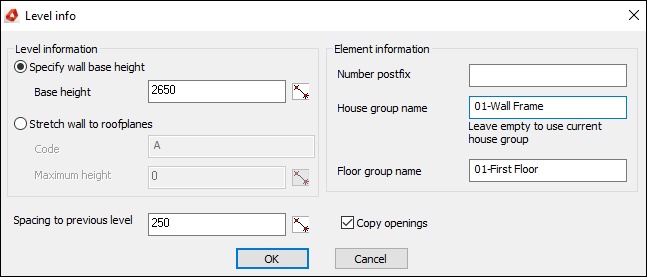
BLOCK_INFO_START
Example
Enter the following two sets of info (Pick apply after each set)
Wall Base Height = 1500
Number Postfix = _GF
Floor Group Name = GroundFloor
Spacing To Previous Level = 0
Wall Base Height = 2450
Number Postfix = _FF
Floor Group Name = FirstFloor
Spacing To Previous Level = 237
BLOCK__END
To apply the wall split, select OK and pick the walls that you want to split.
Stretch wall
You will at times need to stretch walls if they end in an inappropriate location or they are too short. You stretch a wall by selecting the wall and this will highlight the walls grips, to stretch the wall pick on one of the arrows at the left or right of the wall. Move the mouse in the direction that you want to stretch the wall and type the distance you want to make the wall shorter or longer by.
e.g. If you want to shorten the right of the following wall by 400mm, pick the arrow move the mouse to the left and type 400.
BLOCK_INFO_START
You can also use the Autocad stretch command in order to stretch walls.
BLOCK__END

Move wall
You can move walls by using the Autocad move command or by selecting the wall and highlighting any of the three square grips on the wall outline and moving them, the wall will move with the grip.

Editing wall definition
To edit the wall definition (Stud Spacing, Distribution etc.) you use the hsbEdit command which you can access by right clicking on the wall (wall outline or wall icon) and selecting Edit hsbcad data.
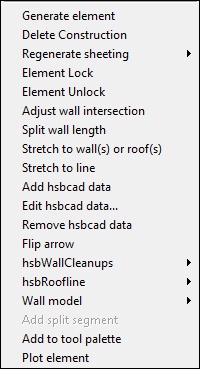
in the Wall Definition dialog you can change any of the wall Information, except the base height. For more information on the wall definition settings see How to draw hsbWalls

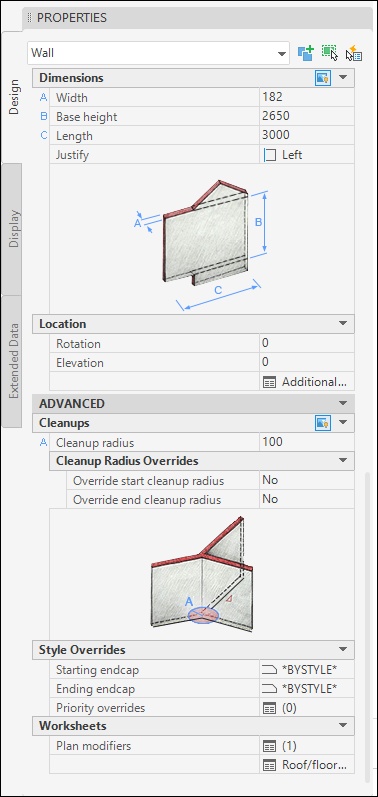
Another method to edit the hsbWall is to select the wall by right clicking on the wall outline or wall arrow and accessing the hsbData through the Autocad properties dialog box. Here you will see that you can enter values for all of the hsbWall definition, including the wall base height.
BLOCK_INFO_START
If you are using hsbcad with Autocad rather than Architectural Desktop, you will not be able to access all of the hsbData through the Properties dialog box.
BLOCK__END
