hsbShare | Model Viewer
General overview
In the model viewer, you can view the model in the current selected project. This widget will also show elements or entities when selecting a Document or an Issue.
Viewer
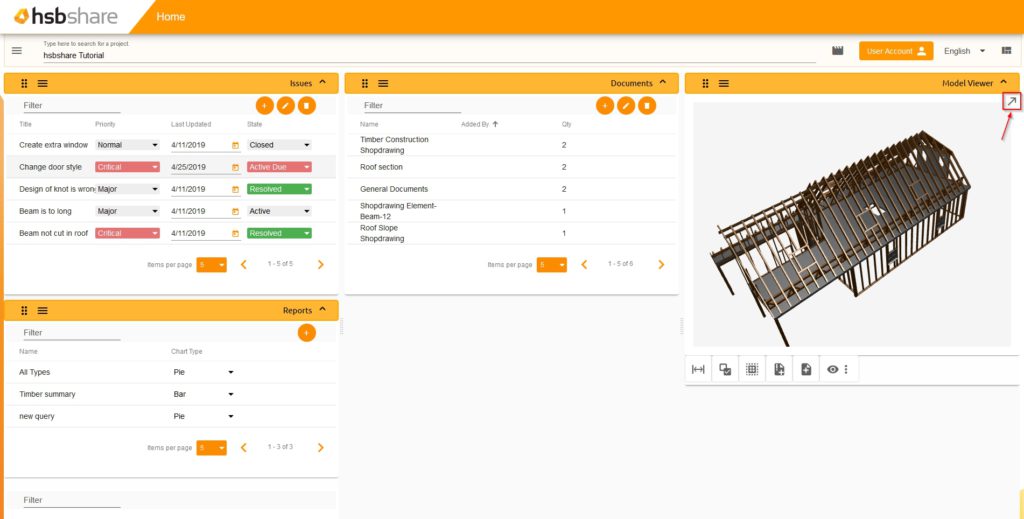
The model viewer has two different sizes. You can expand the model viewer to make the viewer full screen by pressing the button in the top right corner of the model viewer widget.
BLOCK_INFO_START
Some features like the treeview and the properties are only available when the model viewer is full screen.
BLOCK__END
How to expand the model viewer
Step 1. Select the expand button in the top right corner of the model viewer widget.
Step 2. The model viewer will be expanded.
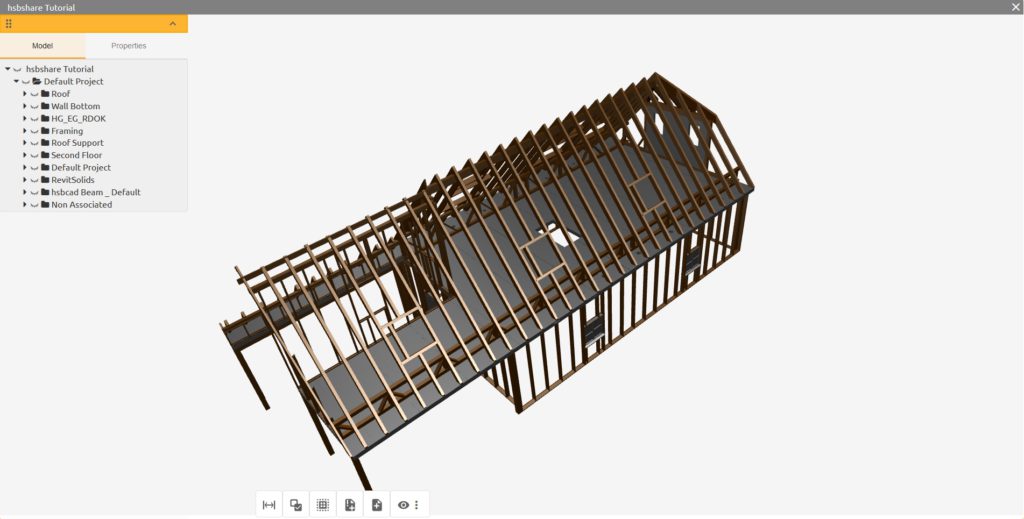
Treeview
Properties
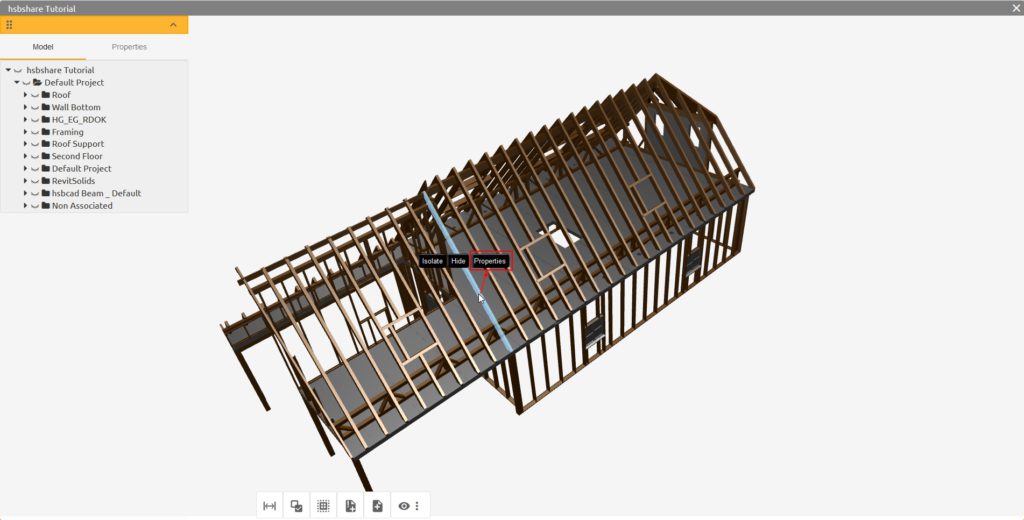
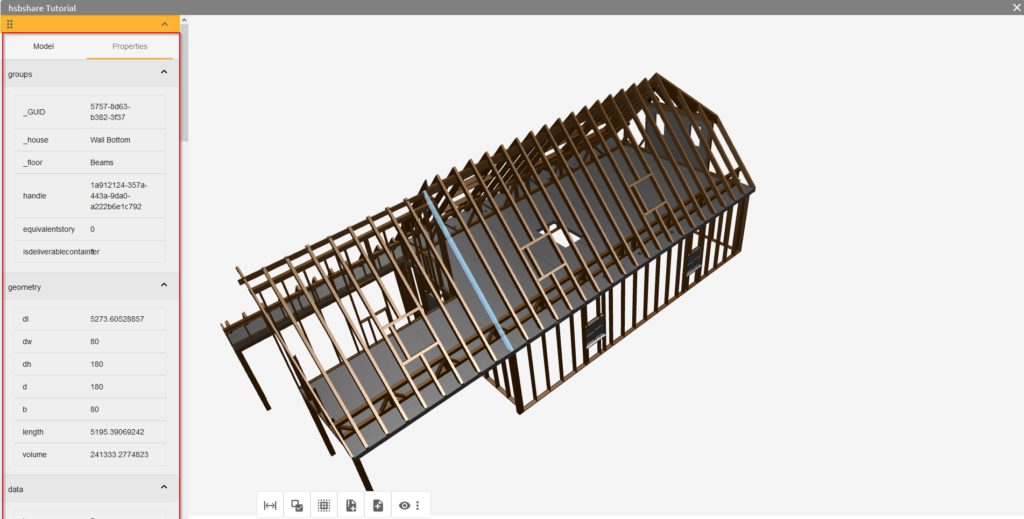
When selecting an element or entity, you can choose to see its properties. At the left or right side of the model viewer, it will show the properties of the selected element or entity.
Step 1. Select the element or entity which you want to see the properties of.
Step 2. The properties will show up in a column next to the model viewer.
Toolbar
The Toolbar is the most important tool in the model viewer. The toolbar has a couple of different buttons; Measure, Multi Select, Entity/Element Select, Add Issue, Add Document and View Cube.
Measure
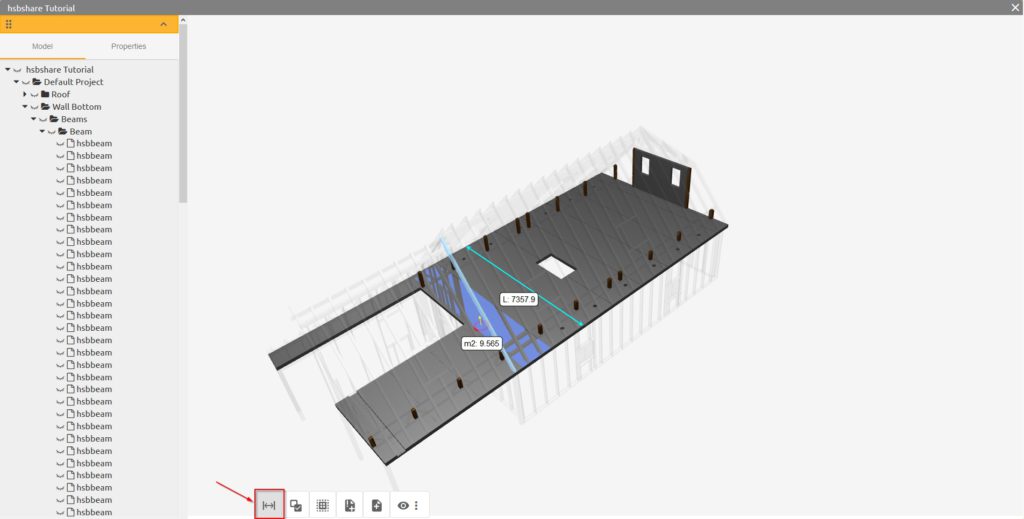
This function lets you measure the length of an element or entity or lets you see the m2 of the plane you are hovering on. Press the measure button to toggle measuring.
Multi Select
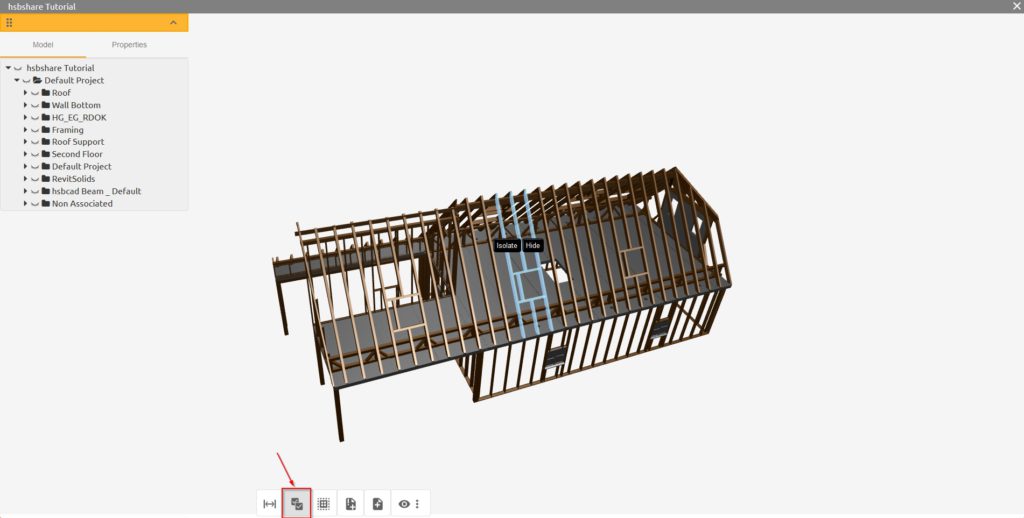
This function lets you select more than one element or entity. You can select multiple objects to isolate or hide them in the model viewer.
BLOCK_INFO_START
Normally, when not pressed you will only be able to select one element/entity.
BLOCK__END
Entity/element select
This function lets you toggle between selecting an element or selecting an entity in an element.
Add issue
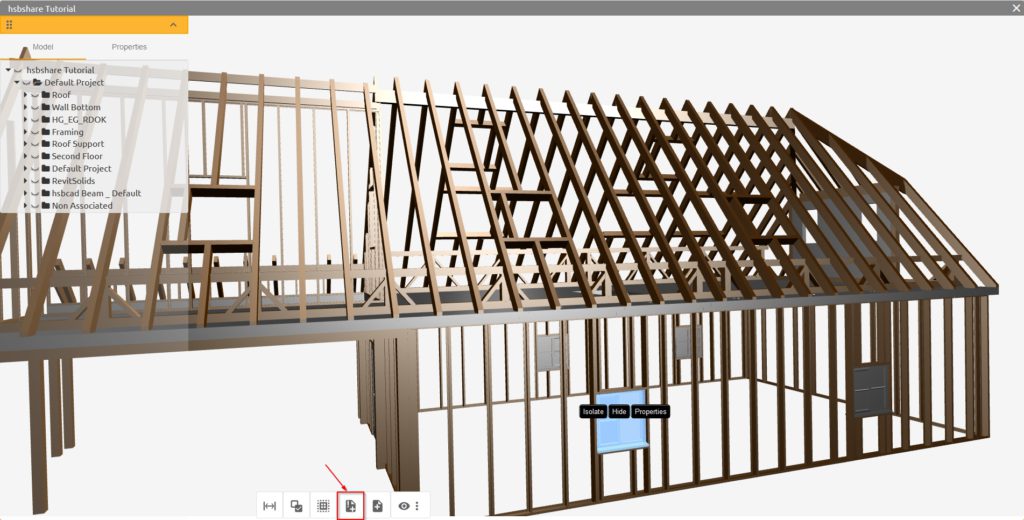
This button lets you add an Issue to a selected element or entity. When creating an issue, the different entities or elements it is connected to will be in the issue dialog. The next time when you select this issue, the connected entities/elements will show up in the model viewer.
How to add an issue to an entity
Step 1. Select the entity or entities which you want to attach to the issue.

Step 2. Press the button for adding an Issue in the toolbar.
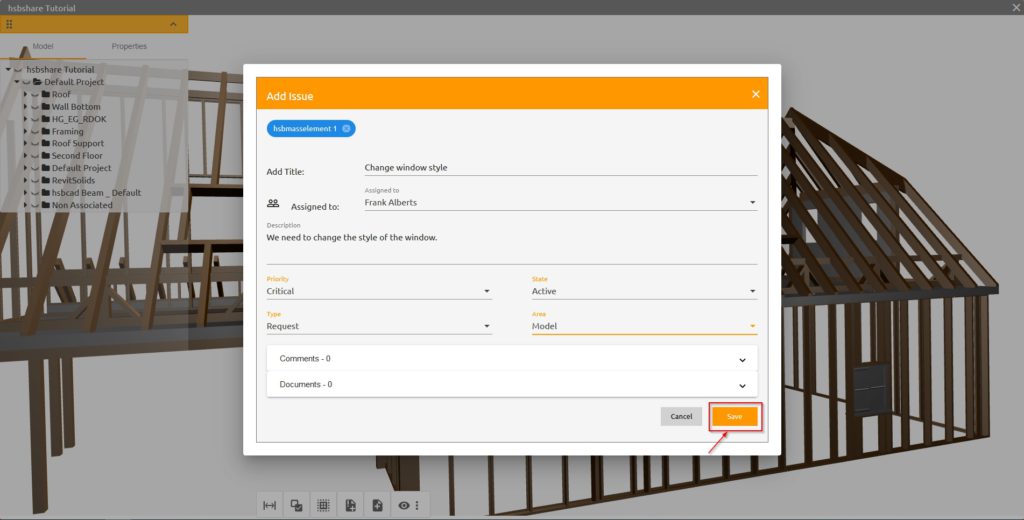
Step 3. Fill in the issue and press save.
Add document
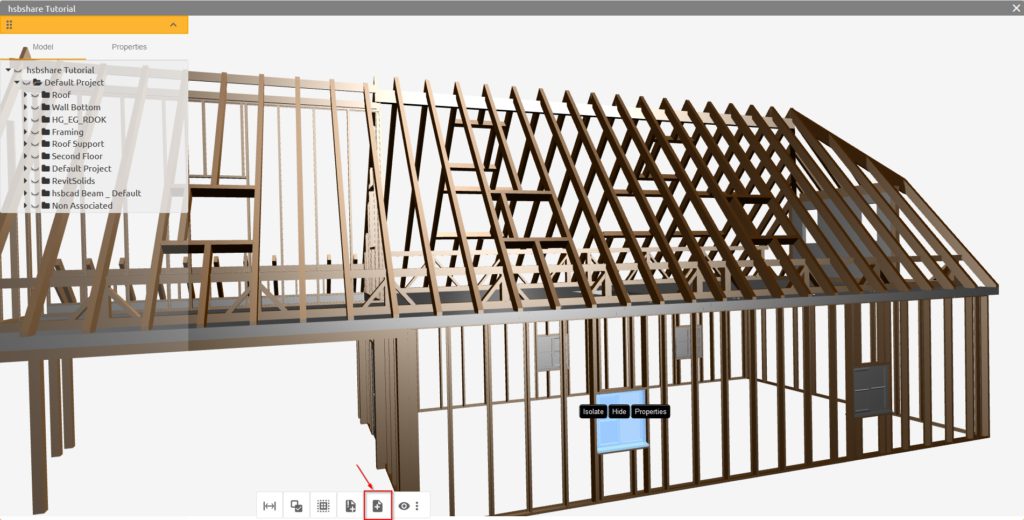
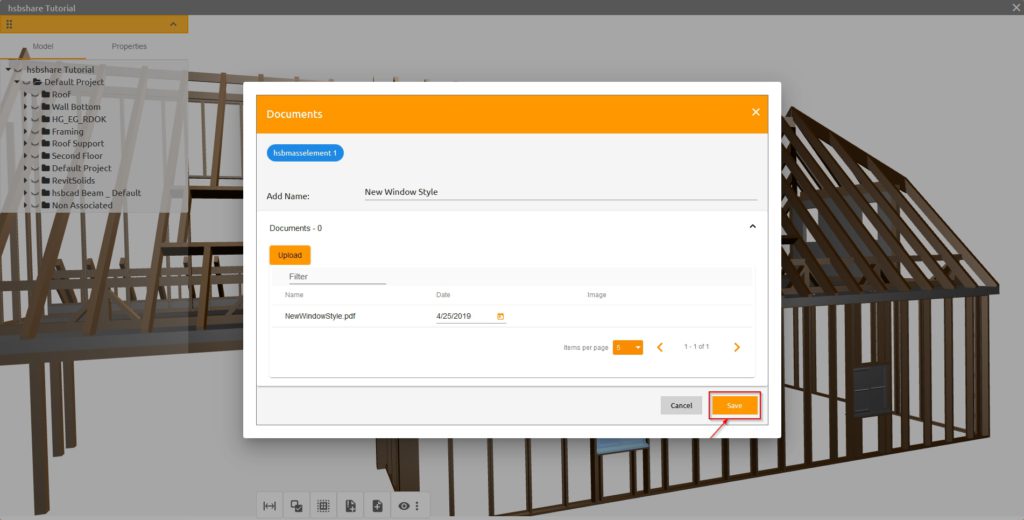
This button lets you add a Document to a selected element or entity. When creating a document, the different entities or elements it is connected to will be in the document dialog. The next time when you select this document, the connected entities/elements will show up in the model viewer.
Step 1. Select the entity or entities which you want to attach to the document.

Step 2. Press the button for adding a Document in the toolbar.
Step 3. Fill the document and press save.
View cube
This button lets you set a pre-defined view in the model viewer.

