hsbView | Step 2: Configuring Folder Paths in hsbView
This document will show you the second step in defining the Folder location.
After organizing your project files and configuration files into the appropriate structure in step 1, the next step is to tell hsbView where these files are located on your computer. This ensures that hsbView can access and load your project data correctly.
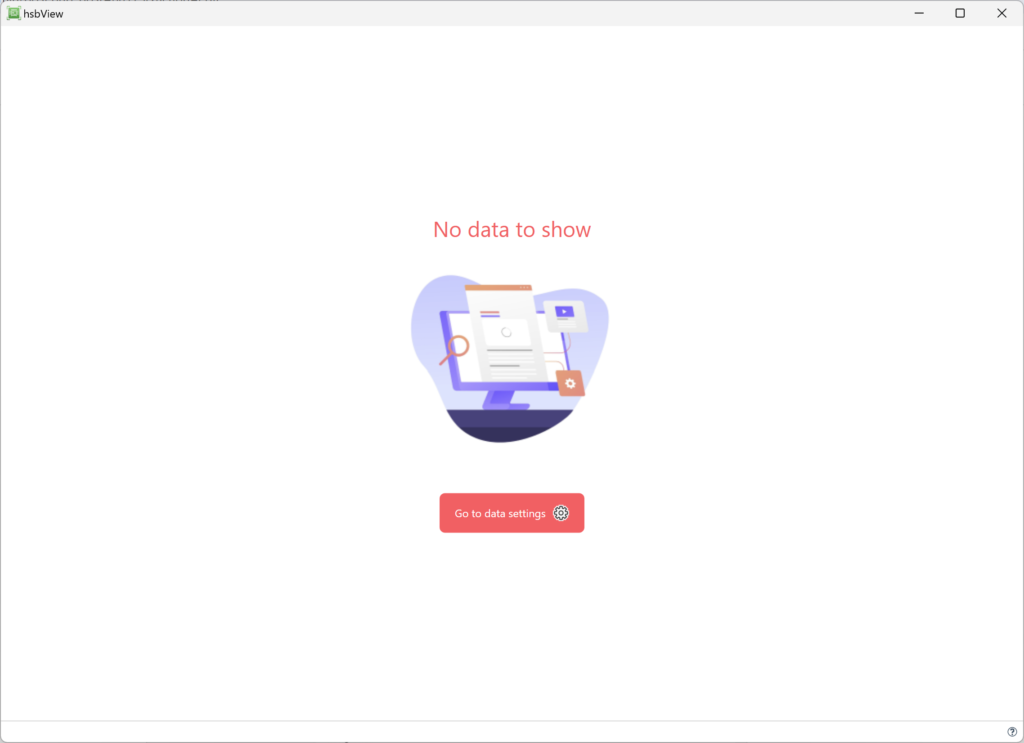
When no data is available for the application, the following screen shows and you need to go to the Data settings by clicking on "Go to data settings"

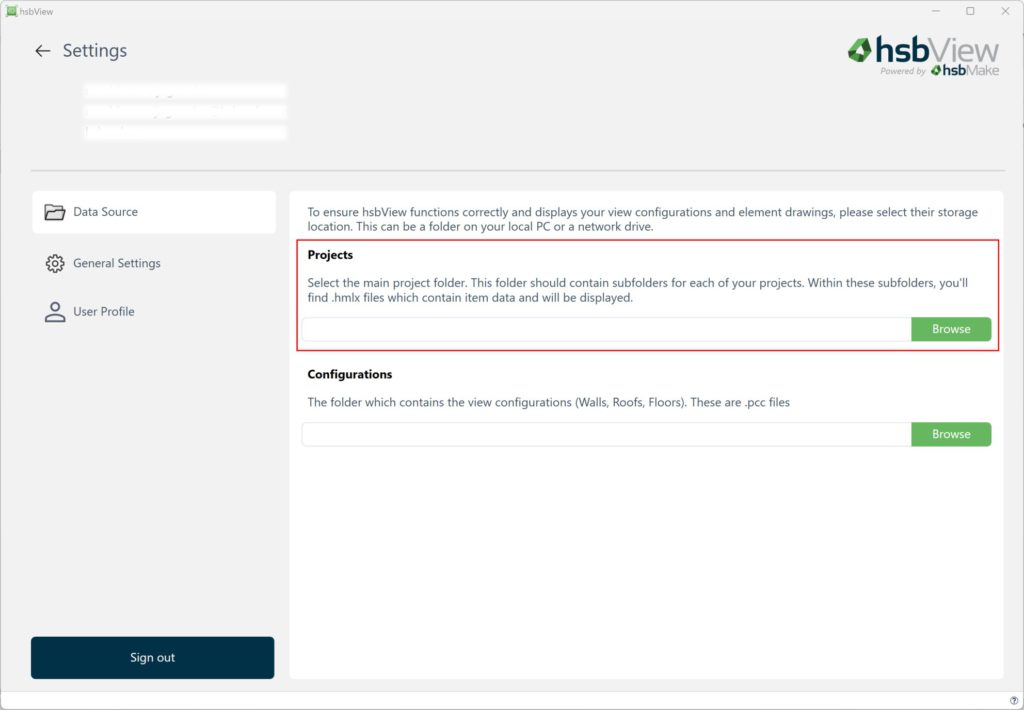
Set Projects Folder Path:
- Click the "Browse" button at the Projects area.
- A file explorer window will open. Navigate to the location of your "All Projects" folder that you set up earlier.
- Select the folder and confirm your choice. The path to this folder will now appear in the field.

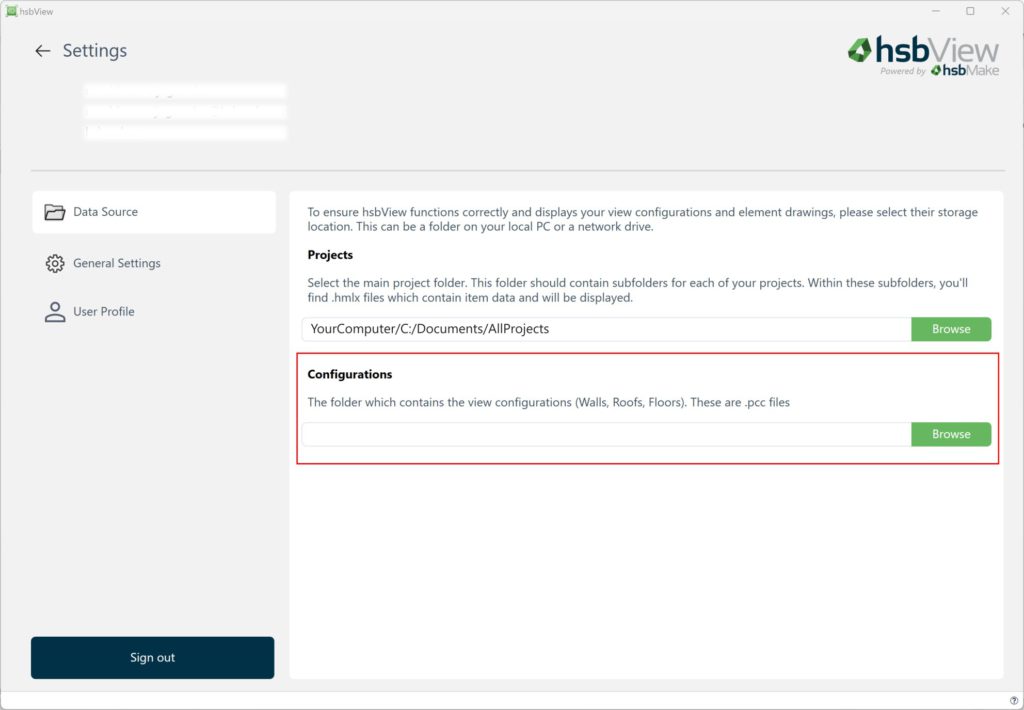
Set Configurations Folder Path:
- Click the "Browse" button below at the Configurations area.
- In the file explorer window, navigate to where you stored your configurations folder (as detailed in step 1 the folder setup guide).
- Select the folder and confirm your selection. The path to your configurations folder will be displayed in the field.

Viewing data
After configuring hsbView to recognize the correct data locations, you can easily return to the main interface of the application. Simply click on the return arrow, located at the top left corner of the screen. This action will take you back to the main dashboard where you can start exploring and utilizing the various features of hsbView.
Next: Exploring hsbView

