Revit® | Convert Revit® walls to hsbcad CLT walls
This document will show you how to convert Revit® walls into hsbcad CLT walls.
- First determin which walls are used in the project.
- Of each type of wall used in your project, make a copy.
- At the wall division you look at which material you want to convert to CLT.
- You replace the existing material to a CLT panel that you created earlier.
- You repeat this step for all walls used, as well as for other elements such as floors or roofs if applicable.
- Then you replace all existing walls with the duplicated wall types with CLT properties.
After you have gone through these steps you can use the hsbCLT ribbon.
In the ribbon you select the CLTs and or Sheetings button.
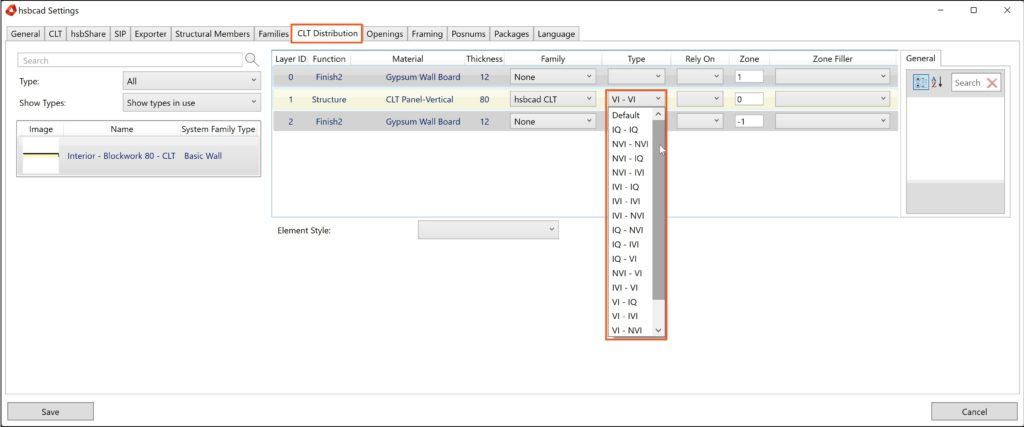
This opens the dialog box hsbcad Settings under the Tab CLT Distribution you can find all the wall/floor elements.

In order to assign hsbcad properties to your CLT element and show which view quality it should comply with, choose hsbcad CLT under Family.
BLOCK_INFO_START
View topic Revit® | hsbCLT Surface quality for more information about this.
BLOCK__END

Under Type you can find the pre-made types.
Select the desired quality of vision for each wall/floor structure.
After you have completed these steps, select Save and these properties will be allocated in the project.
These properties can be modified later on if necessary, this is also possible per element in the properties.
This will divide your walls into parts.
It is possible that you get the impression that you can't edit these elements anymore after the previous editing.
This is because your elements are divided into parts.
In your Parts Visibility under your properties you can change which elements you want to see, in that way you can still edit the elements.

To display only the CLT parts in your model, do this by adding filters in your Visibility/Graphic Overrides where you can turn off all materials except of your CLT elements.

