Revit® | Creating Framing Styles for Revit® (Video)
Configure a framing style to create timber frame walls using the framing style editor, inventory aliases and zone configurations.
hsbStickFrame | Framing Styles Editor
This document will show you the way you can work with our framing styles editor.
The editor can be opened from the ribbon in our platform as described below.

- Select the Framing Styles Editor and the Framing Styles Editor dialog box will open.
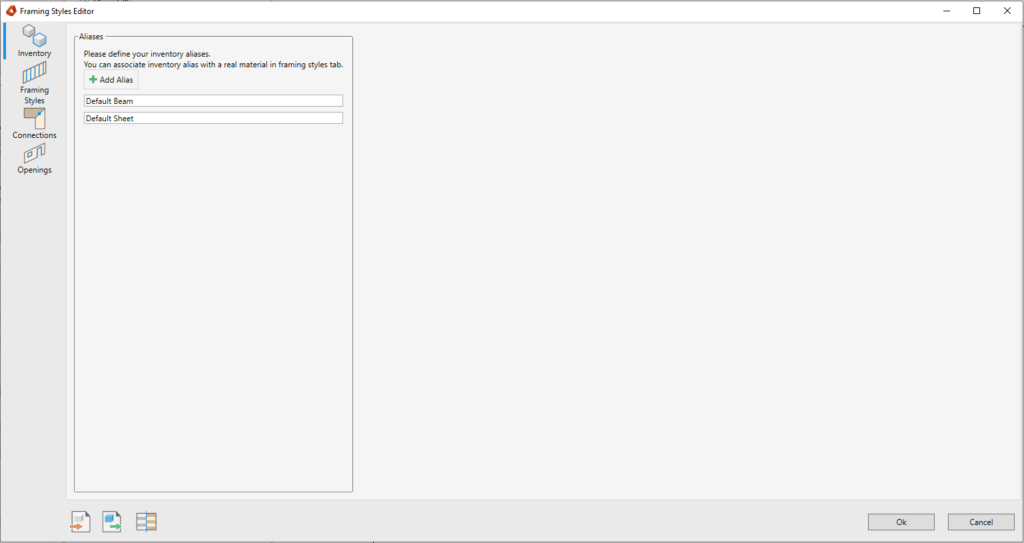
Inventory
The Inventory section has one main button.
BLOCK_INFO_START
By adding Aliases, a user is capable of given parts (for example bottomplate) a specific alias name. This alias can be chosen in the inventory tab in the Framing Styles tab.
BLOCK__END
Framing Styles
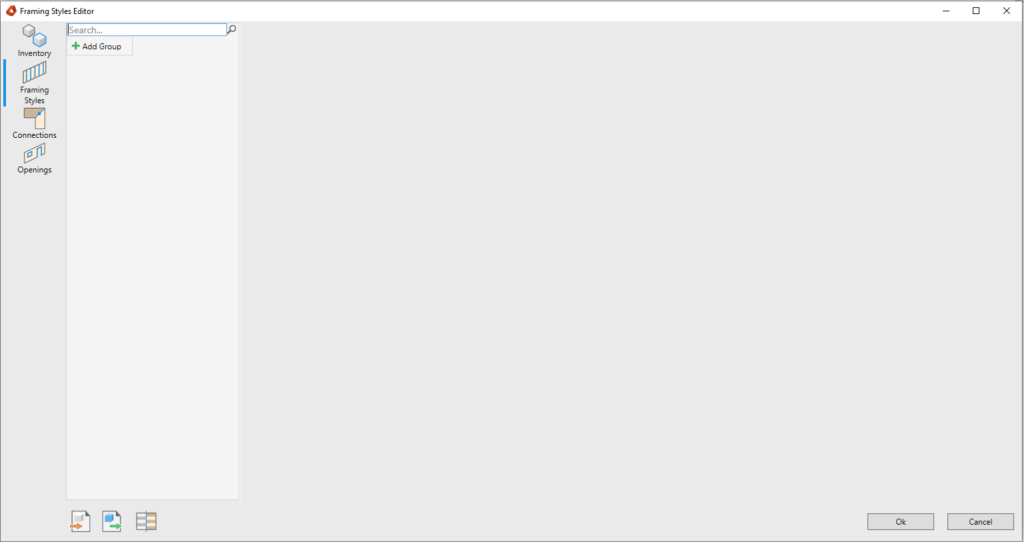
After opening the Framing Styles tab for the first time, this is the first thing you will see:
BLOCK_INFO_START
By slecting the Add Group you are able to create your own Framing Style groups. With this groups, the user is able to make a difference, for example between Internal and External Walls or between Roofs and Floors.
BLOCK__END
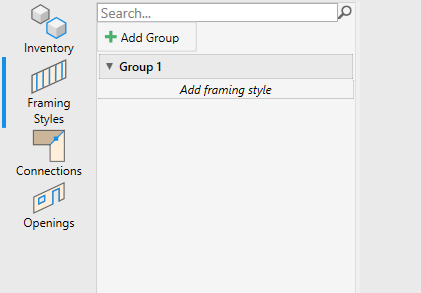
BLOCK_INFO_START
By selecting Add framing style you are able to create your first framing style of the group.
BLOCK__END
When there is a group and framing style created, this is the screen that you will see.

Inventory
This tab will show the available aliases that are created in the Inventory tab.
BLOCK_INFO_START
With the dropdown next to the aliases, your able to select a family type that is available in the model (Family: hsbcad Beam > Type: ...).
BLOCK__END
BLOCK_INFO_START
The family type that is selected in the alias, will update wherever the alias is in use in the framing style.
BLOCK__END
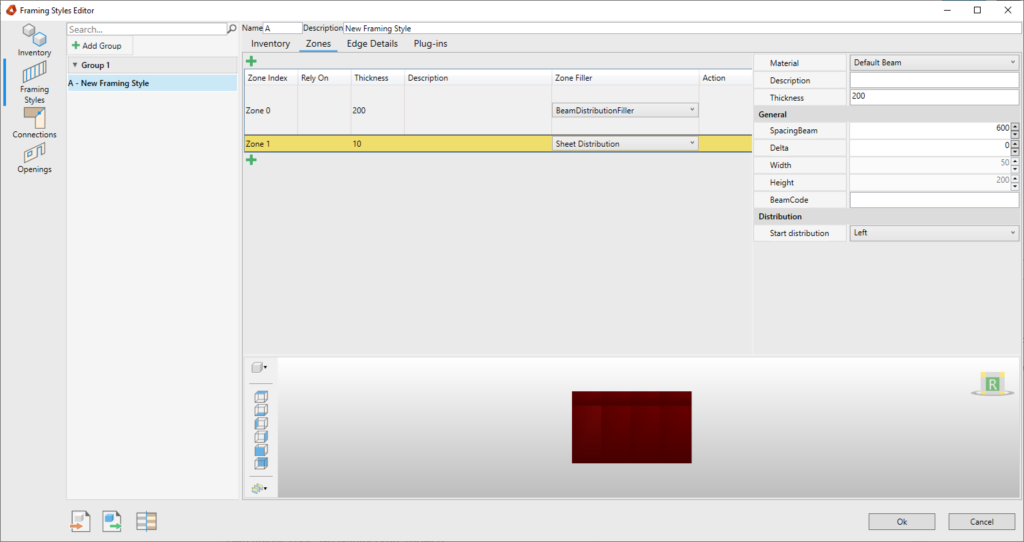
Zones
After opening the Zones tab for the first time, this is the screen you will see.


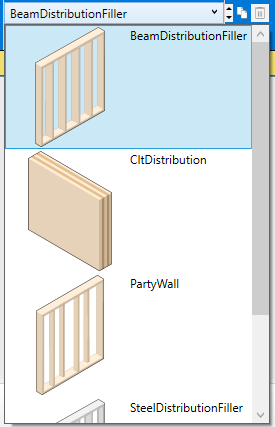
* The Zone Filler has a dropdown to select specific distribution fillers for it's zones.
Available distribution fillers for zone 0
Available distribution fillers for all the other zones:

With the red selected icon above, you are able to add extra zones to the front or back of the framing style
When you select the + icon, this is what you will see.
Edge Details
After opening the Edge Details tab for the first time, this is the screen you will see.


Select Add Detail to add a Edge detail.
This is what you will see if you are going to add a new detail.
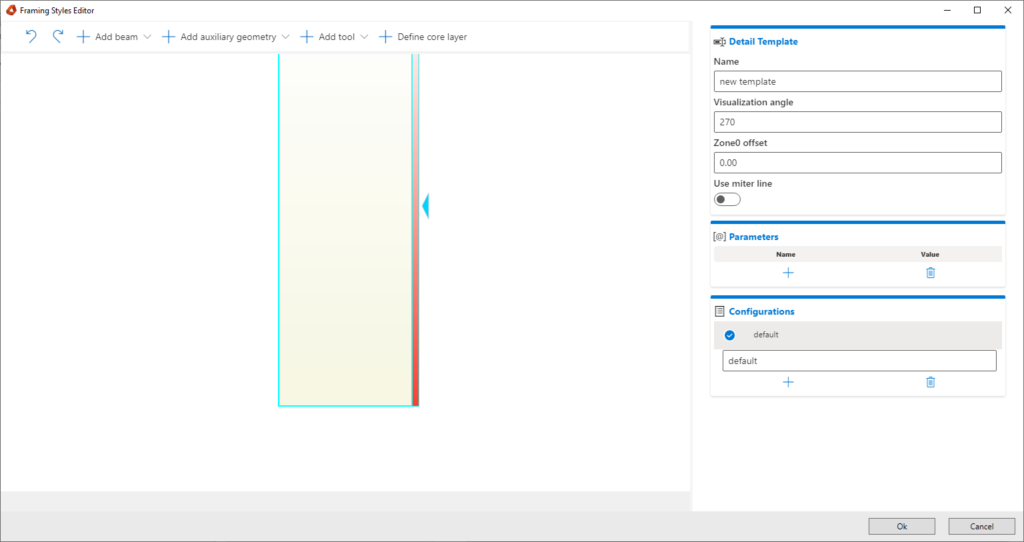
When you select OK, the created edge detail will show up in the Edge Detail tab.
The created edge detail will automatically be assigned to the selected edge in the preview.

BLOCK_INFO_START
If you hoover over a edge detail (with your mouse) an extra options will appear.
BLOCK__END
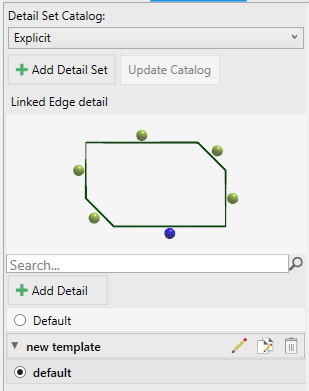
For more details on the detail editor, please select this link: Detail Editor
BLOCK_INFO_START
With these options you can Edit / Copy and Edit / Delete the edge detail.
BLOCK__END
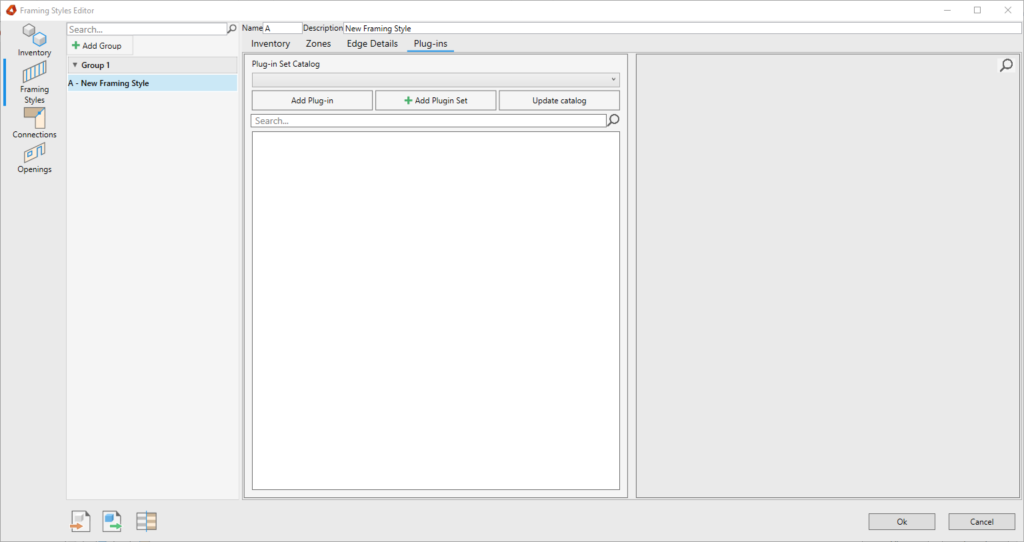
Plug-ins
After opening the Plug-ins tab for the first time, this is the screen you will see.
Connections
After opening the Connections tab for the first time, this is the first thing you will see:
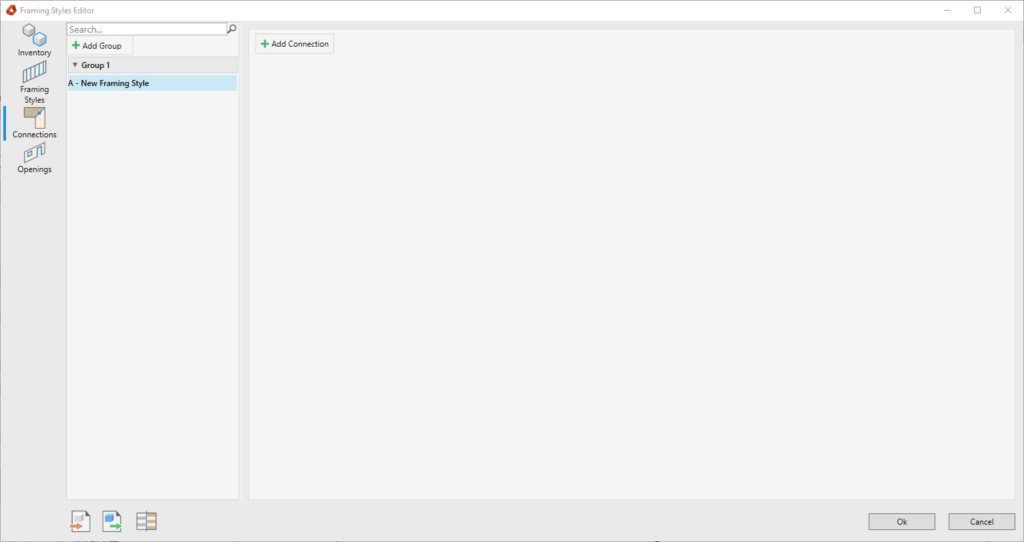
The Connection section has one main button.
When you click on the button 'Add Connection' the next dropdown will appear:
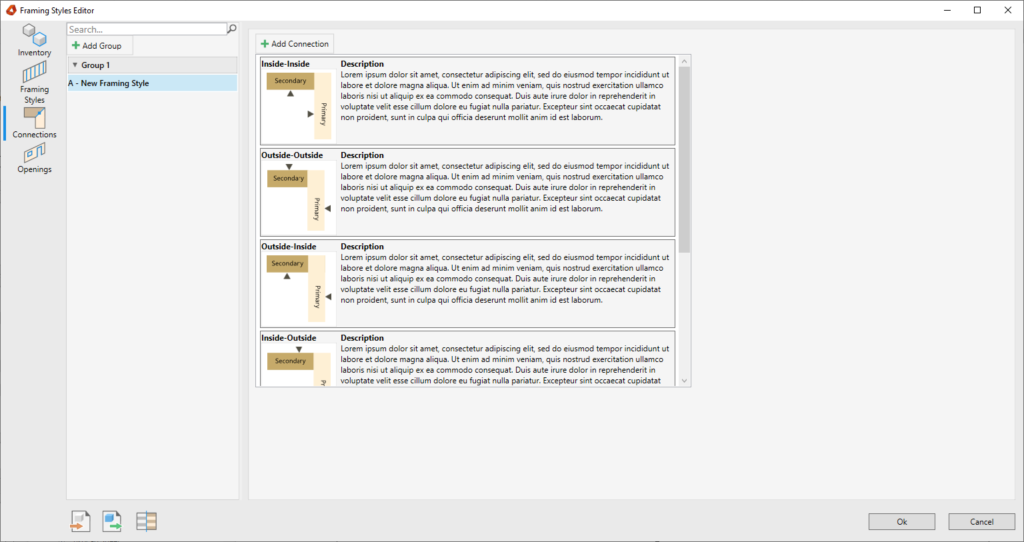
The next connection types are available:
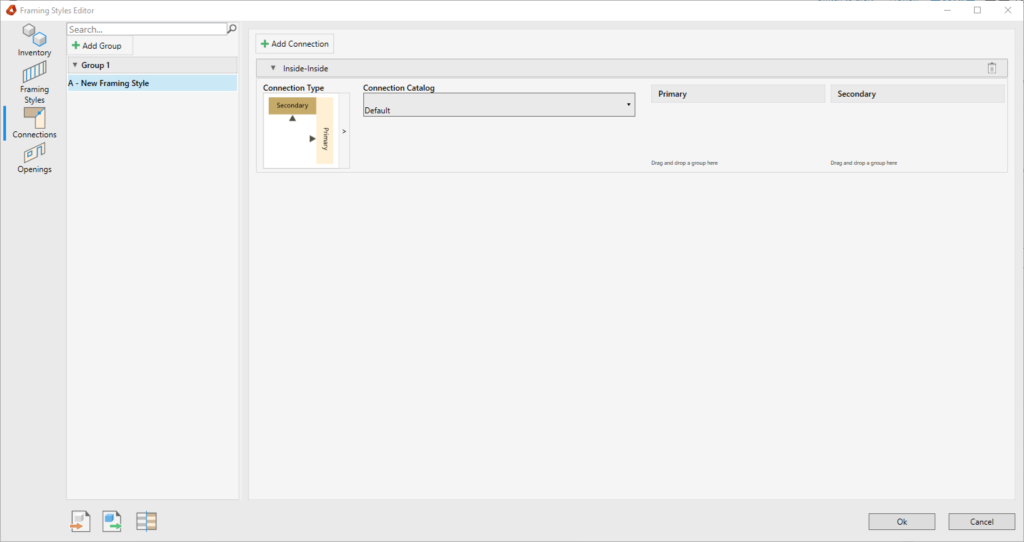
After selecting one of the connection types of the list, this is what you will see:
BLOCK_INFO_START
Before creating a connection detail, the first thing you need to do, is to drag and drop the framing style groups to the primary/secondary.
Later the Detail Editor will show the detail with a framing style that has the most zones.
BLOCK__END
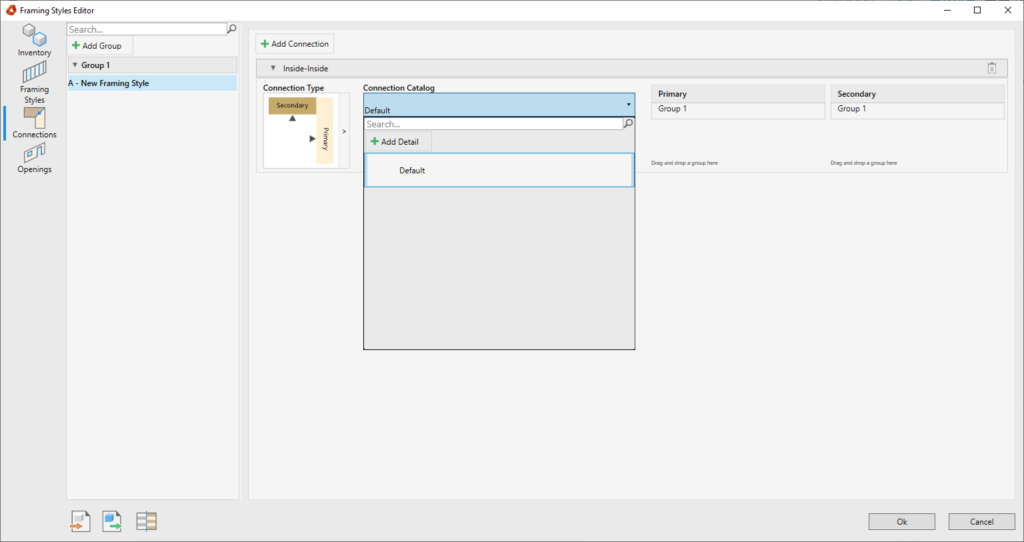
Add or edit a connection type can be done, by clicking on the dropdown of the connection catalog.
Openings
After opening the Openings tab for the first time, this is the first thing you will see:
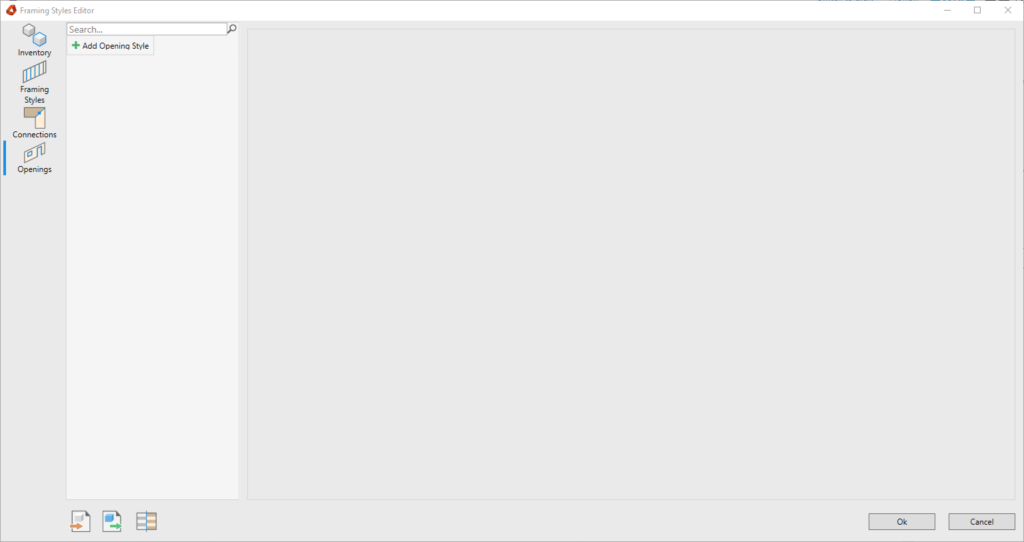
The Openings section has one main button.
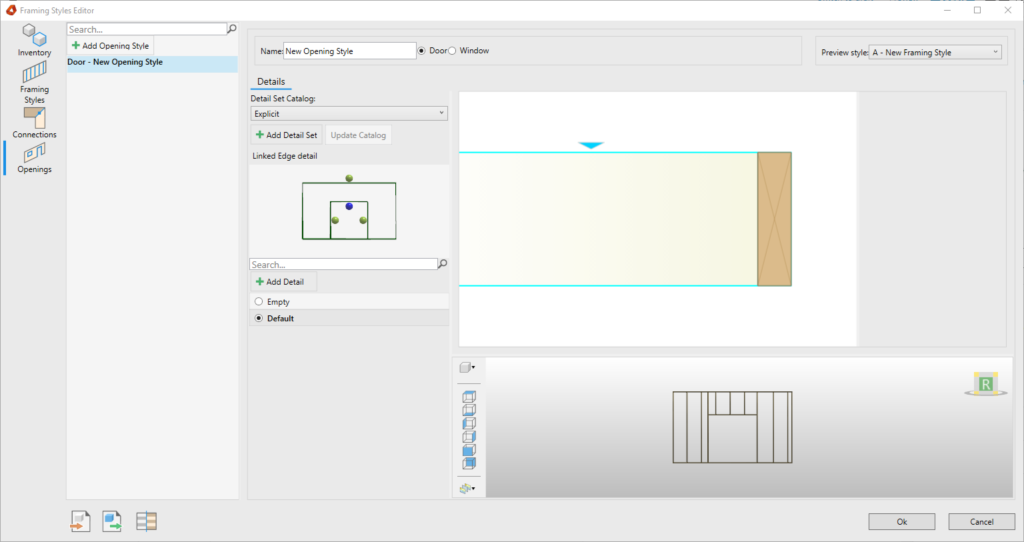
After adding a new Opening style, this will be the first thing you will see:
This document will show you the way you can work with our framing styles editor.
The editor can be opened from the ribbon in our platform as described below.

- Select the Framing Styles Editor and the Framing Styles Editor dialog box will open.

Inventory
The Inventory section has one main button.
Add AliasUse the add button to add a new Alias
BLOCK_INFO_START
By adding Aliases, a user is capable of given parts (for example bottomplate) a specific alias name. This alias can be chosen in the inventory tab in the Framing Styles tab.
BLOCK__END
Framing Styles
After opening the Framing Styles tab for the first time, this is the first thing you will see:

BLOCK_INFO_START
By slecting the Add Group you are able to create your own Framing Style groups. With this groups, the user is able to make a difference, for example between Internal and External Walls or between Roofs and Floors.
BLOCK__END

BLOCK_INFO_START
By selecting Add framing style you are able to create your first framing style of the group.
BLOCK__END
When there is a group and framing style created, this is the screen that you will see.

Inventory
This tab will show the available aliases that are created in the Inventory tab.
BLOCK_INFO_START
With the dropdown next to the aliases, your able to select a family type that is available in the model (Family: hsbcad Beam > Type: ...).
BLOCK__END
BLOCK_INFO_START
The family type that is selected in the alias, will update wherever the alias is in use in the framing style.
BLOCK__END
Zones
After opening the Zones tab for the first time, this is the screen you will see.


* The Zone Filler has a dropdown to select specific distribution fillers for it's zones.
Available distribution fillers for zone 0

Available distribution fillers for all the other zones:

With the red selected icon above, you are able to add extra zones to the front or back of the framing style
When you select the + icon, this is what you will see.

Edge Details
After opening the Edge Details tab for the first time, this is the screen you will see.


Select Add Detail to add a Edge detail.
This is what you will see if you are going to add a new detail.

When you select OK, the created edge detail will show up in the Edge Detail tab.
The created edge detail will automatically be assigned to the selected edge in the preview.

BLOCK_INFO_START
If you hoover over a edge detail (with your mouse) an extra options will appear.
BLOCK__END

For more details on the detail editor, please select this link: Detail Editor
BLOCK_INFO_START
With these options you can Edit / Copy and Edit / Delete the edge detail.
BLOCK__END
Plug-ins
After opening the Plug-ins tab for the first time, this is the screen you will see.

Connections
After opening the Connections tab for the first time, this is the first thing you will see:

The Connection section has one main button.
When you click on the button 'Add Connection' the next dropdown will appear:

The next connection types are available:
After selecting one of the connection types of the list, this is what you will see:

BLOCK_INFO_START
Before creating a connection detail, the first thing you need to do, is to drag and drop the framing style groups to the primary/secondary.
Later the Detail Editor will show the detail with a framing style that has the most zones.
BLOCK__END
Add or edit a connection type can be done, by clicking on the dropdown of the connection catalog.

Openings
After opening the Openings tab for the first time, this is the first thing you will see:

The Openings section has one main button.
Add Opening StyleUse the add button to add a new Opening Style
After adding a new Opening style, this will be the first thing you will see:

Details
More video’s of hsbStickFrame
Revit® | hsbStickFrame in a nutshell for Revit®
Revit® | How to install hsbStickframe for Revit®
Revit® | hsbStickFrame for Autodesk Revit®
Revit® | Creating Framing Styles for Revit®
Revit® | Match Framing Styles for Revit®
Revit® | Create Edge Details for Revit®
Revit® | Create Connection Details for Revit®
Revit® | Butt Connection for Revit®
Revit® | Framing a Wall for Revit®
Revit® | Framing with Persist Technology for Revit®
Revit® | Framing an Opening for Revit®
Revit® | Structural Blocking for Revit®
Revit® | Tools for hsbStickFrame
Revit® | Setting up Shop Drawings for Revit®
Revit® | Creating a Pocket for Revit®
Revit® | Creating a Point Load for Revit®
Revit® | Creating a Vent for Revit®
Revit® | Working with Validations for Revit®
Revit® | Cripple Studs for Revit®
Revit® | Notch plates for Revit®
More video’s of hsbStickFrame on hsbDesign25
Revit® | Framing Style Editor Enhancements on hsbDesign25 for Revit®
Revit® | Import and Export in hsbDesign25 for Revit®
Revit® | Linked Files on hsbDesign25 for Revit®
Revit® | Profiles on hsbDesign25 for Revit®
More video’s of Revit® on hsbDesign26
Revit® | Item Container Lock for Revit®
Revit® | Family Version Control for Revit®
Revit® | Span direction on floors and roofs for Revit®
Revit® | New Shop Drawing User Interface

