Essential Guide to hsbExport | hsbExporter (Video)
This document will give you information about how to use the hsbexporter.
Available Video’s of the Exporter
hsbExport | How to create an Export /Group (Video)
hsbExport | How to Import PDF Settings in the Exporter (Video)
BLOCK_INFO_START
All of your exports/ groups and settings are stored in your current hsbcompany folder.
BLOCK__END
BLOCK_INFO_START
Before you start exporting don’t forget to number all your entities. More information about numbering entities can be found in the article: Add numbering.
BLOCK__END
Select the option hsbCAM\Element export\CNC Exporter.

OR select the CNC exporter in the Ribbon

This will open the CNC Exporter dialog box.
CNC Exporter
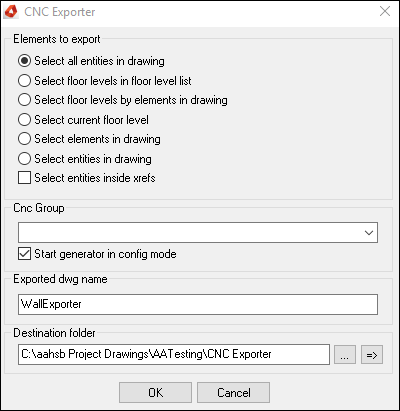
Elements to export
At the Elements to Export section select "Select all Entities in drawing" option to export.
CNC group
- Select a Cnc Group (if you haven’t made a group yet see the following paragraphs below to create an Export\group in the hsbExporter).
- Select the Start generator in config mode (config mode means that the Export manager will open, in the Export Manager you can set all your settings and create exports/ groups. You don’t need to select the config mode (Export manager) all the time). Once you have set up your exports and groups you can run groups directly when the Start generator in config mode is deselected.
Destination folder
BLOCK_INFO_START
Optional: set the destination location (by default the export will be stored in the folder where the drawing is located).
BLOCK__END
How to create an Export
After running the CNC exporter command, the ExportManager dialog will open. Here you can create new exports.

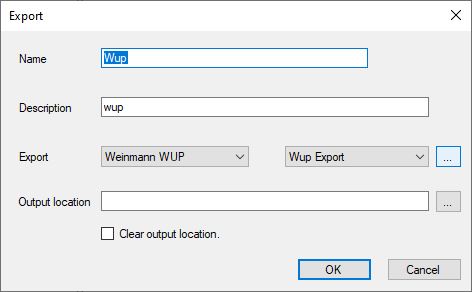
After selecting the Create Export button the Export dialog box will appear.
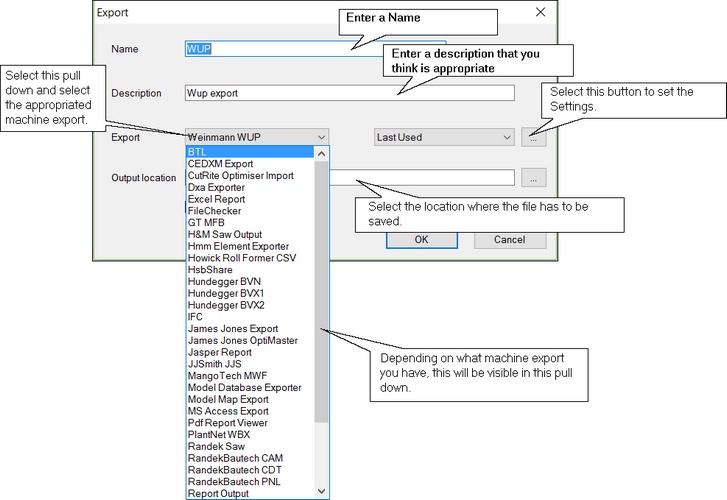
Name - Enter a name for the export.
Description - Enter a description for the export.
Export (pull down menu) - Select the type of export you wish to use.
Last Used (pull down menu) - Catalog Entry for the export settings.
Output location - Select the destination folder by selecting the triple dots (default it will be stored in the folder where the drawing is located)
Clear output location - This clears the whole folder when the export is run.
BLOCK_INFO_START
Export to BTL
Export to BVN
Export to H&M
Export to IFC
Export to ModelX
Export to Excel
Export to WHM Framemaker
BLOCK__END
BLOCK_WARNING_START
Pay attention when using the Clear output location function. All files in the folder you select will be deleted when the export is run.
BLOCK__END
How to create an Group
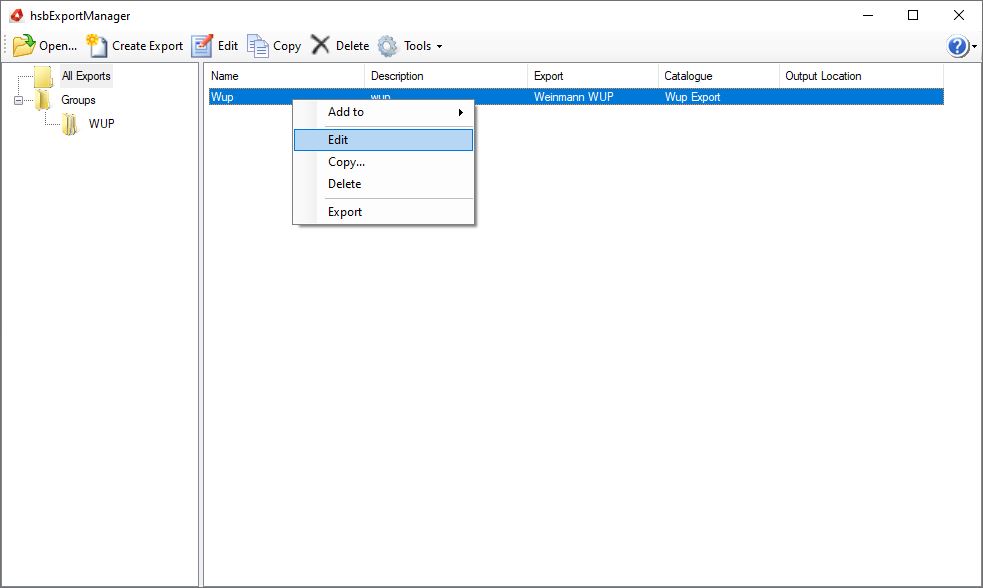
Once you have created an export we now need to Create a group. In this example we have created the test export Wup as shown below.

Next step is to right click the word Groups on the left hand side of this screen and select Create Group.

Give this Group a name, we have called it WUP in this example.

Now we need to add the Wup export settings to this group. Add your Wup export settings to the WUP Group by right clicking the Name (Wup) and select Add to - WUP (this is the group name you have just created).

Export using an Export Group
Now if you run the command again (hsbCAM\Element export\Cnc Exporter) you will be able to select the Cnc group you’ve just made as shown in the example below.
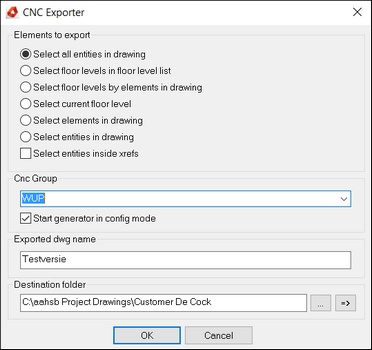
After selecting OK the ExportManager will open, select the Group name you want to export (in this case it is called WUP) and Run the export.

Export settings
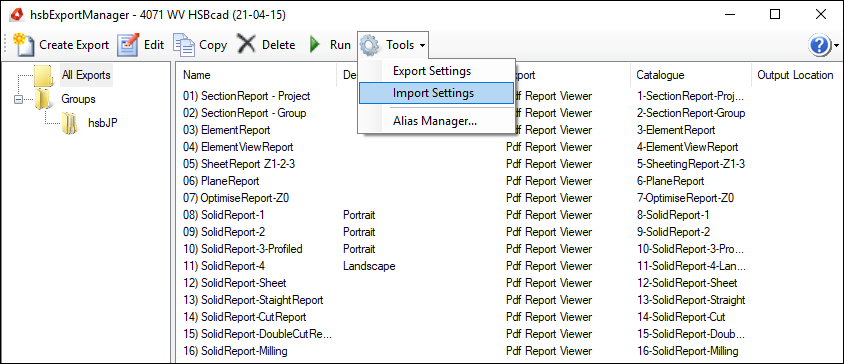
When you have created multiple exports and or groups you can export these to be loaded onto a new computer. When you want to export ALL you export Settings, this can be done by selecting the Tools pulldown. You could export your Settings and then send them to somebody who only has the Standalone cnc Exporter and import these Settings.
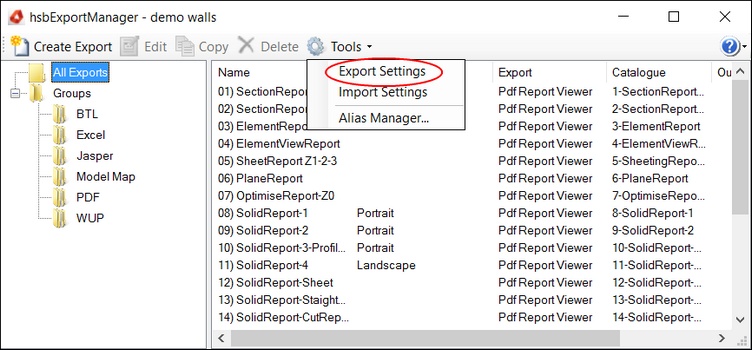
Single Export Settings
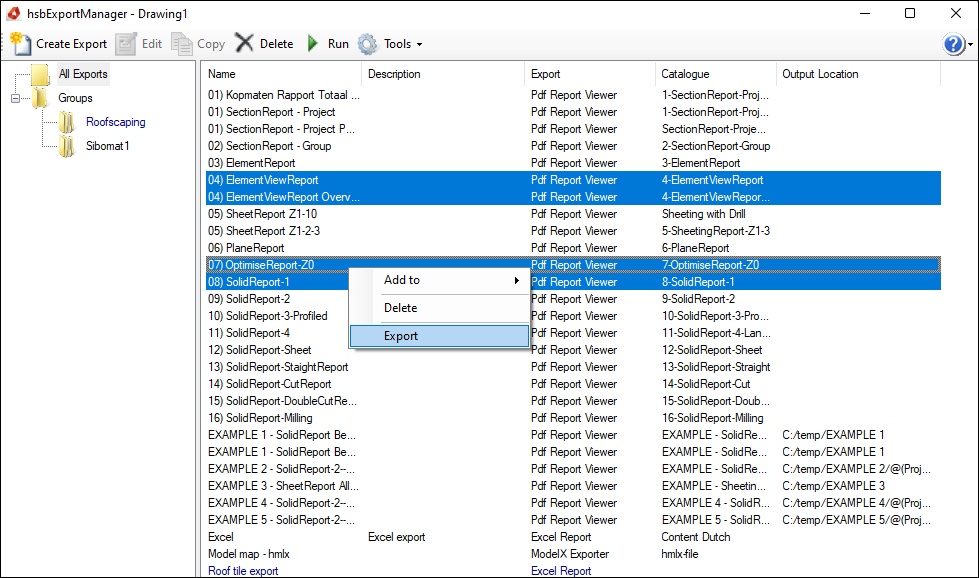
When you want to export a few settings, select a few export, right click and select Export.
You can save these Settings and then send them to somebody who only has the Standalone cnc Exporter and import these Settings.
Import settings (Video)
Using the Import Settings button you can import settings from someone else.
There are some default settings available. These are Excel, PDF and IFC default export settings. These settings can be found in C:\Program Files\hsbcad\hsbdesign..\Content\Dutch\hsbCompany\Export\Content settings
Export extensions
After setting up your export, you can use the exporter for the entire model how it is designed. In addition to that you can add extensions to your exports.
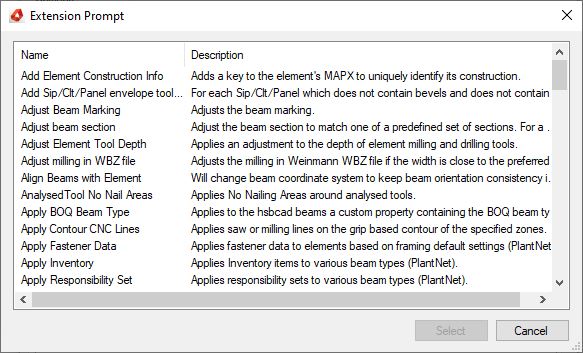
Extensions are there to make your exports even more custom. With extensions you can add additional checks, filters or conversions. Adding extensions can be done as shown below.
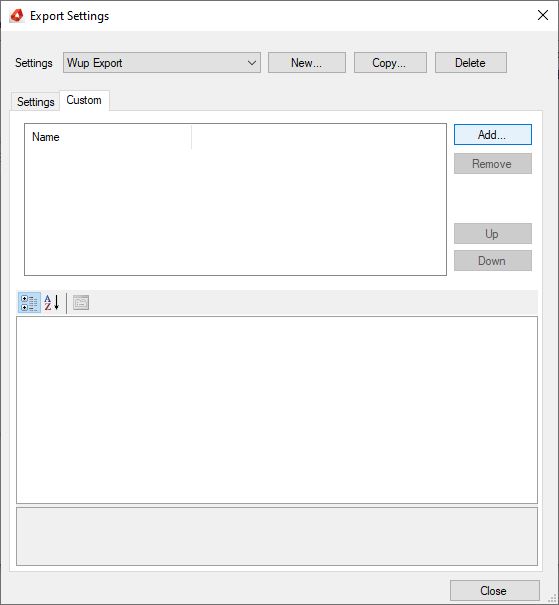
Checks
Adding a check extension to your export gives you the ability to have things checked before the export is run. Validations are used for this.
How to set up validations is described in the article: Validation Manager & Inspector
Once you have set up your validations, you can run a validation group when exporting. To do this you will need to add the Validation extension.
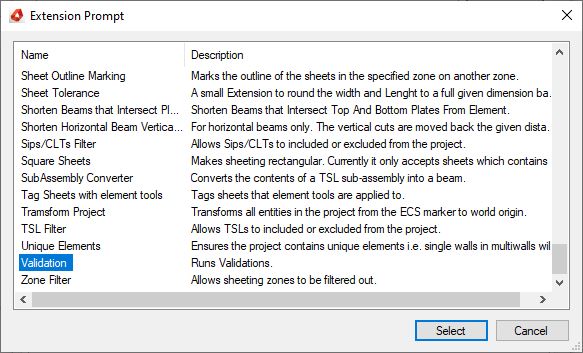
After adding the validation extension you can set different options.
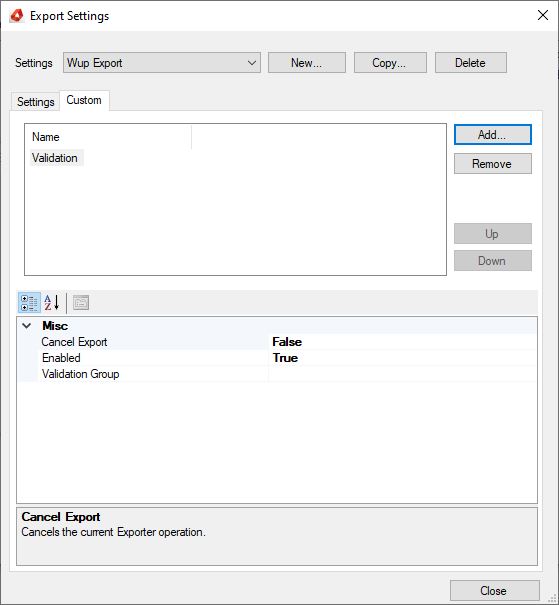
Cancel Export - When the export is run and the validation you have set up is coming up with an error (something in your model is not matching your validation). This setting will decide if your export still continuous. Setting it to True will run your export as normal but will give you a list of export fails. Setting it to False will stop the export once a validation fails.
Enabled - Set this to True to have the extension active. Set this to False to have the extension inactive.
Validation Group - Choose your predefined validation group.
Filters
Adding a filter extension to your export gives you the ability to filter entities for this export. The filter we are going to use in this example is the Beam Filter as shown below.
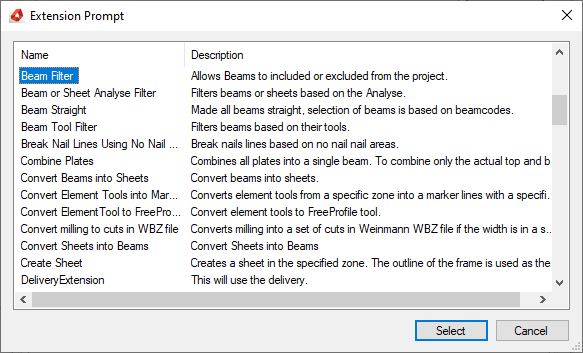
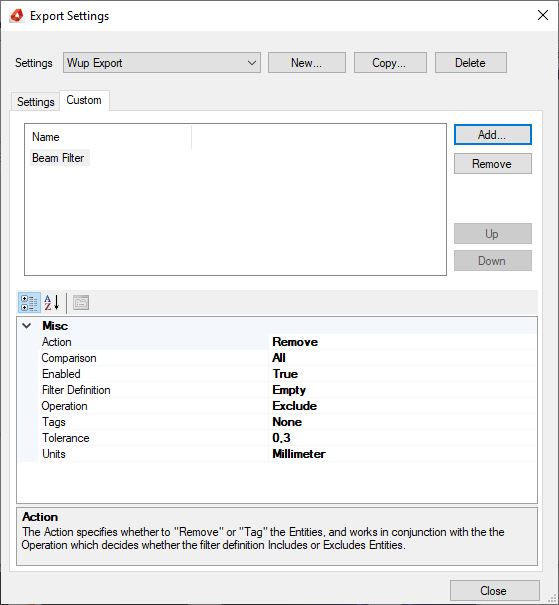
Once the beamfilter is added you can set up the filter for this export as described in the following article: Exporter filters.
Conversions
Adding a conversion extension to your export gives you the ability to convert entities for an export. The conversion we are going to add in this example is the Convert Beams into Sheets as shown below.
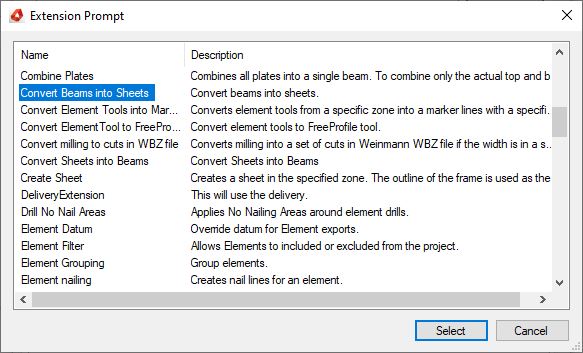
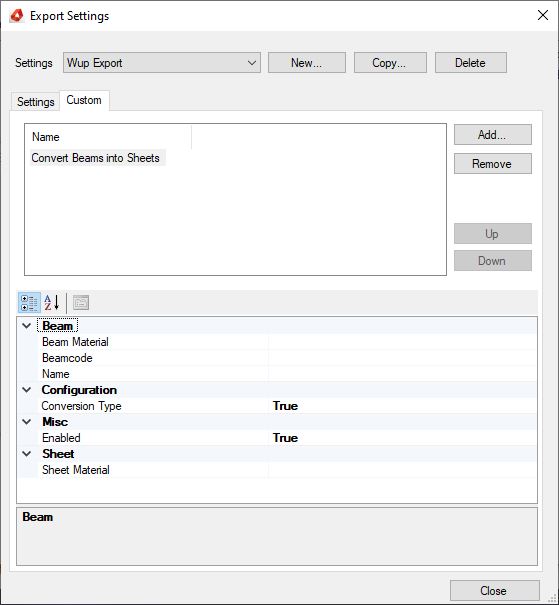
Once the conversion extension is added you can set it up for this export.
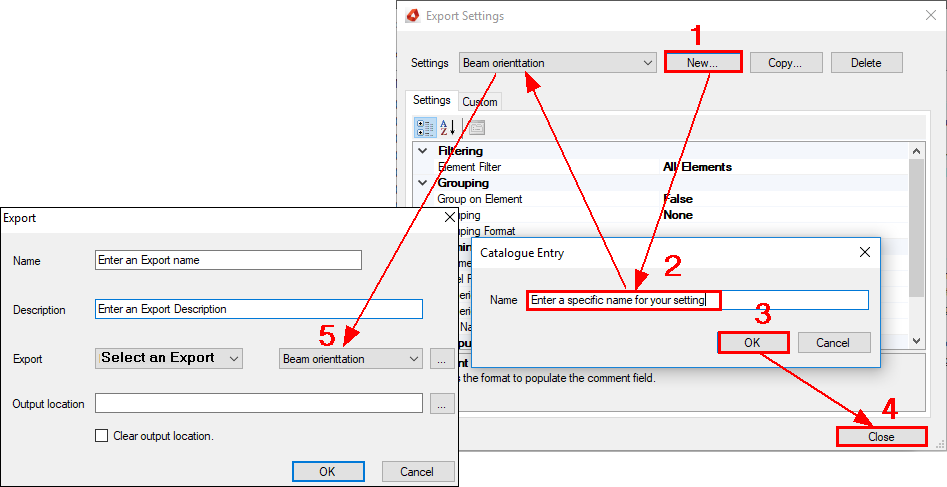
Save your Settings
Once you have set everything in the Setting/Custom tab you can save these settings and recall them later on in the Export dialog box.
Step 1. Select the New button and the catalogue Entry dialog box will open, enter a specific name to your settings.
Step 2. Select OK and the Entry will appear in the Export Settings dialog box.
Step 3. You can create several exports if you want.
Data formatting in the Exporter
In the exporter you can use variables, these can be properties of Objects, Elements or Project settings.
The format string is made up of constant text and variables. The variables take the form: @(<VariableName>)
For more information see the article hsbCad Model Data Formatting.
Aliases
Aliases allow values to be replaced with another value, an alias. The aliases are stored in files inside the company folder.
For more information see the article Alias Manager
PropertySets and MapX
Propertysets are groups of Properties that are added to objects.
MapX is a map (like a set of properties) that is available in the exporter.
MapX and PropretySet data can be accessed by simply specifying the path to data in the underlying map starting with the MapX key or PropertySet name.
The MapX data will take precendence over the PropertySet data.
e.g. An entitty has MapX data with a key of "Hsb_ElementInfo" which contains a value "Weight".
This could be accessed using the format:
@(Hsb_ElementInfo.Weight)
The path for MapX data can go as deep as necessary.
e.g. @(Key.SubMap1.SubMap2.SubMap3.ValueKey).

