Essential Guide to hsbShare | Import IFC into hsbDesign
This Document will describe the workflow to import an ifc file into hsbDesign for Autocad Architecture.
The import will use hsbshare as a viewer to visualize the ifc file, so you can make visual decisions on the content you want to import.
hsbshare console
The hsbshare console is a dockable console with a link to all your hsbshare projects and available in hsbDesign for Autocad Architecture and Revit.
For more information see: hsbshare console
To start working with the new ifc import you have to open the hsbshare console in hsbDesign for Autocad Architecture with the command HSB_SHARE.
To import ifc files we need to upload the ifc files to hsbshare, in order to do this you need an hsbshare account or login to your account.
Create a share account
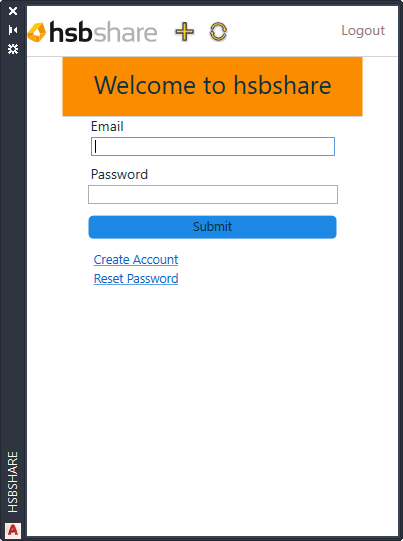
Ifc files can be added to an existing hsbshare project or you can create a new project
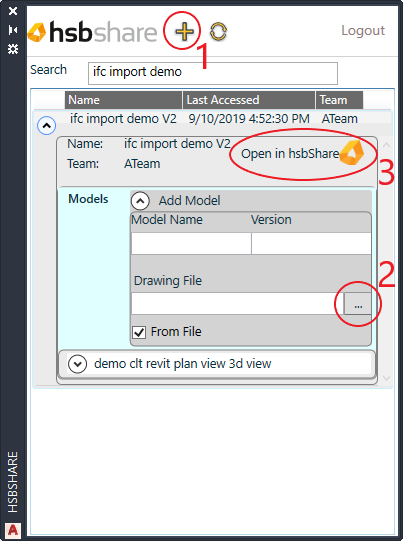
2. Add ifc file to a project
3. Open project in hsbshare
Make sure the From File checkbox is ticked, this will allow you to select the ifc file from your file system.
You can set a model name and a version of your model. hsbshare supports multiple models and or different versions of the same model.
- Select Add Model to upload the ifc to the project in hsbshare.
- Select Open in hsbShare to open the model in hsbshare.
hsbshare
In hsbshare make sure you have the import selection set widget1 turned on.
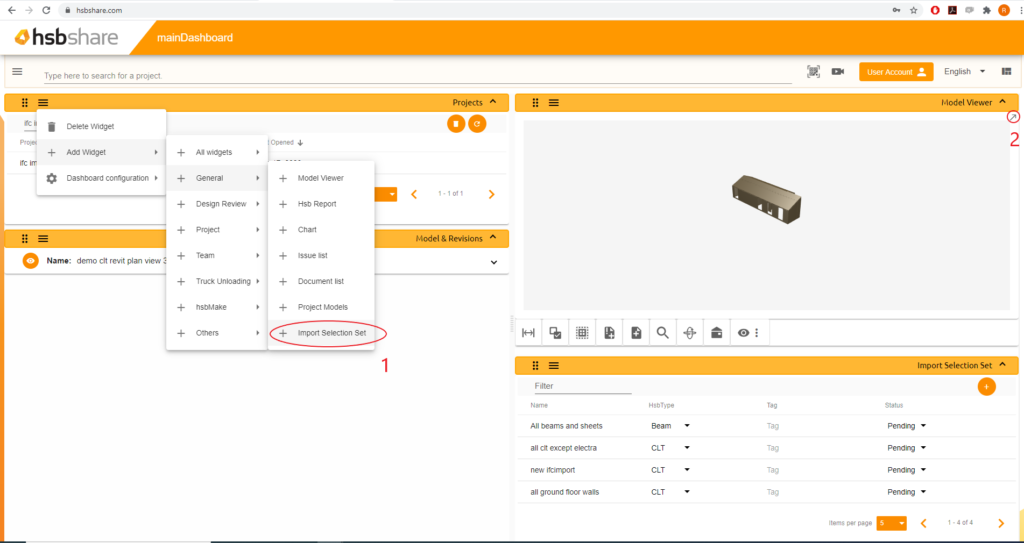
2. Enlarge model viewer
In order to import a model in ACA you need to create selection set(s).
When you enlarge the model viewer2 you will be able to create a selection set of the objects that are currently visible in the view.
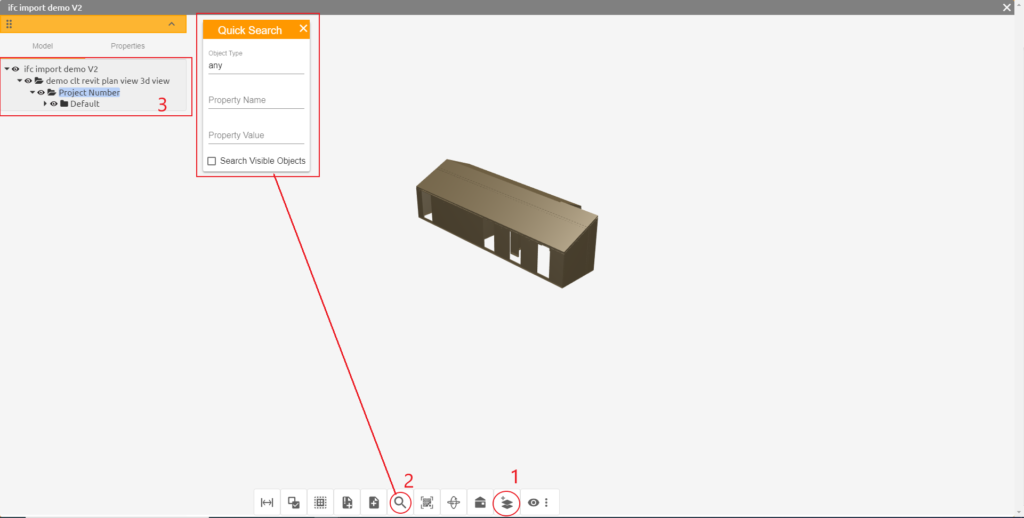
2. search
3. Model tree
You can use several ways to get your desired set visible, including the search2 and tree view3 model viewer.
Once you have your objects visible in the model you can save1 this set of objects and assign the hsbtype.
The hsbtype is the object type of the selection.
For example when you select Beam the objects in the selection set will be imported as beams in ACA.
The amount of objects per type in the selection set are shown in blue in the top of the dialog:
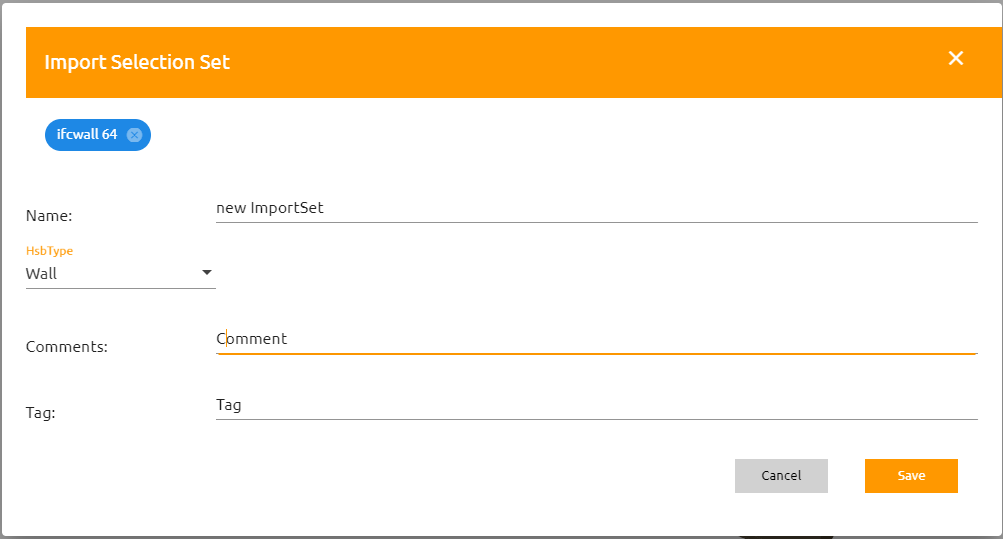
You can give the selection set a name, this name will be visible in the share console in ACA. Optionally you can add comments and tags to your selection set, which will also be visible and available in ACA. Use the "Save" button to save the selection set.
Import in ACA
When you return to the hsbshare console in ACA you need to refresh1 the console to see the new selection set.
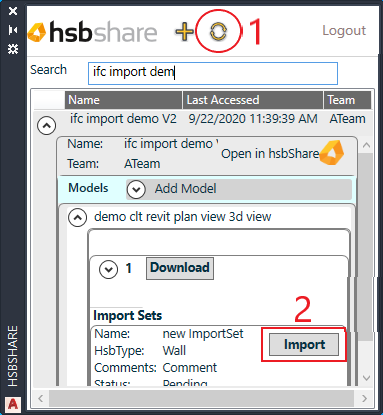
2. Import selection set
Each selection set can be imported through the import2 button.
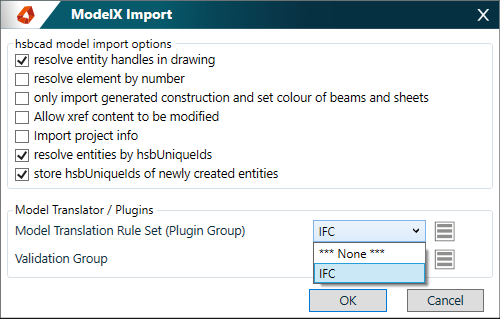
This will open the ModelX Import dialog.
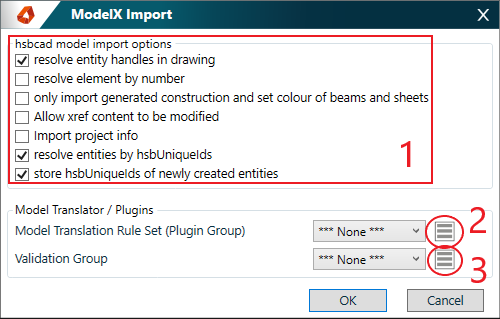
2. Group extension manager
3. Validation manager
Make sure that in the import settings the top one and the two bottom checkboxes are checked1.
These settings will make sure that once you re-import the same model you do not get duplicate entities in your model.
In order to convert the objects in the selection set to the object type that was selected in hsbshare we will need to add a plugin / extension to the import process.
This can be done in the Groupextensionmanager2. Additionally we can add validations to the import of the ifc. This can be done in the Validationmanager3.
Extension Group Manager
The Extension Group Manager allows you to add a group of plugins/ extensions to the import process, these extensions will alter the model before it gets imported.
The extension you will need to convert the objects from ifc is called Convert imported body to an hsbItem.
You can import default settings from the content to create the Group with the correct extension.
In order to import the settings select the import1 command and select the file IfcImportExtension.settings typically located in: C:\Program Files\hsbcad\hsbDesign version\Content\General\hsbCompany\Import

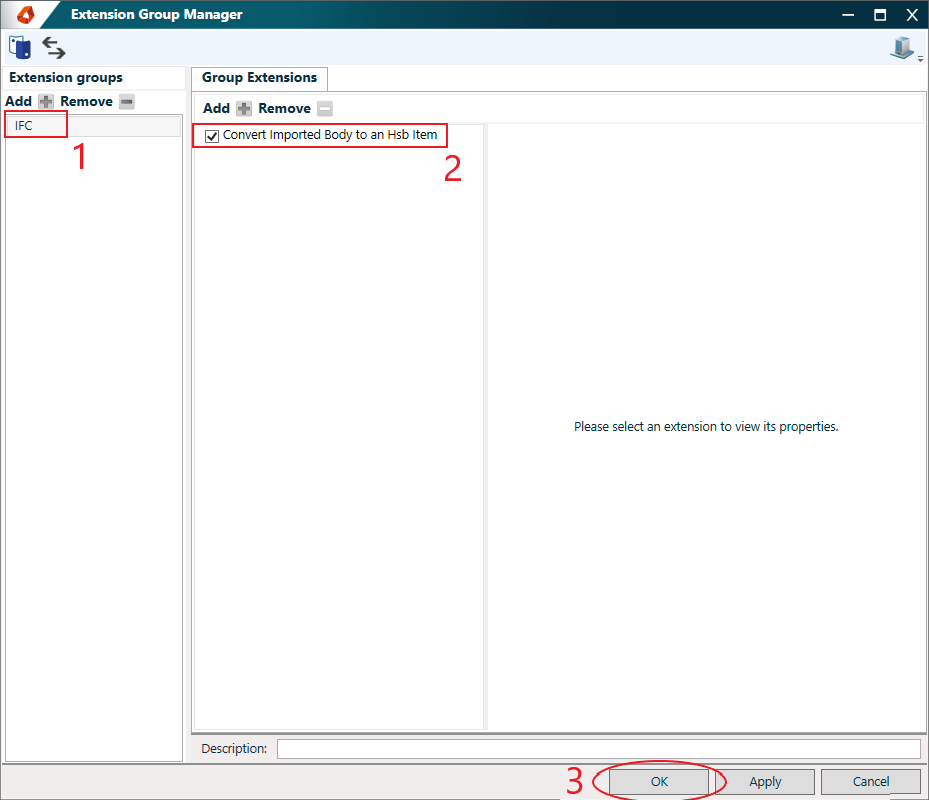
2. Extension "Convert Imported Body to an hsb item"
3. OK button
After importing you will see that the IFC Group1 with the extension2 has been created. When selecting OK3, the settings are saved and you will return to the ModelX Import dialog.
In the ModelX Import dialog you will now be able to select the IFC group:
Validation Manager
Validations can check the created model based on rules you add in the validationmanager (see first ModelX Import dialog image).
One example of a helpful validation is the imported body checker, this validation will check if the body of the objects that got imported matches the original ifc body.
You can import default settings with this validation from the content.
In order to import the settings select the import1 command and select the file IfcImportValidation.settings typically located in: C:\Program Files\hsbcad\hsbDesign version\Content\General\hsbCompany\Import
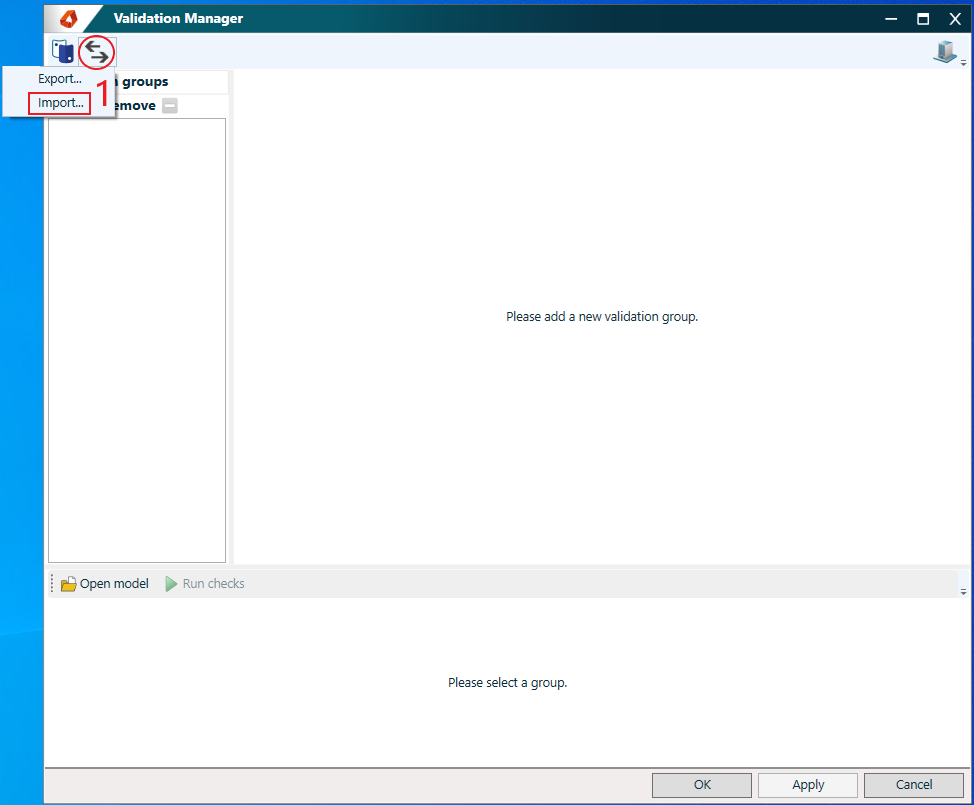
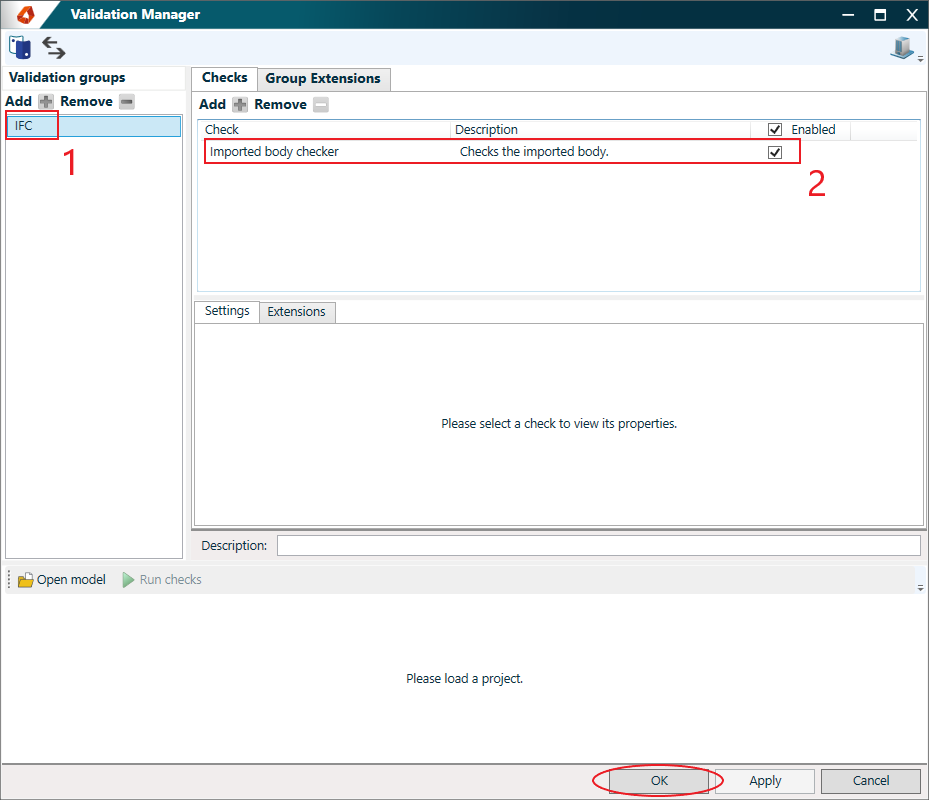
2. Validation "Imported body checker"
3. OK button
After importing you will see that the IFC Group1 with the validation2 has been created. When selecting OK3, the settings are saved and you will return to the ModelX Import dialog.
In the ModelX Import dialog you will now be able to select the IFC group:

After setting the plugin group and the validationgroup, you can select the OK button to import the selection set.
Log and Validation Inspector
After importing the selection set the Log and validationmanager will appear.
Here you have two tabs, the Log and the validation.
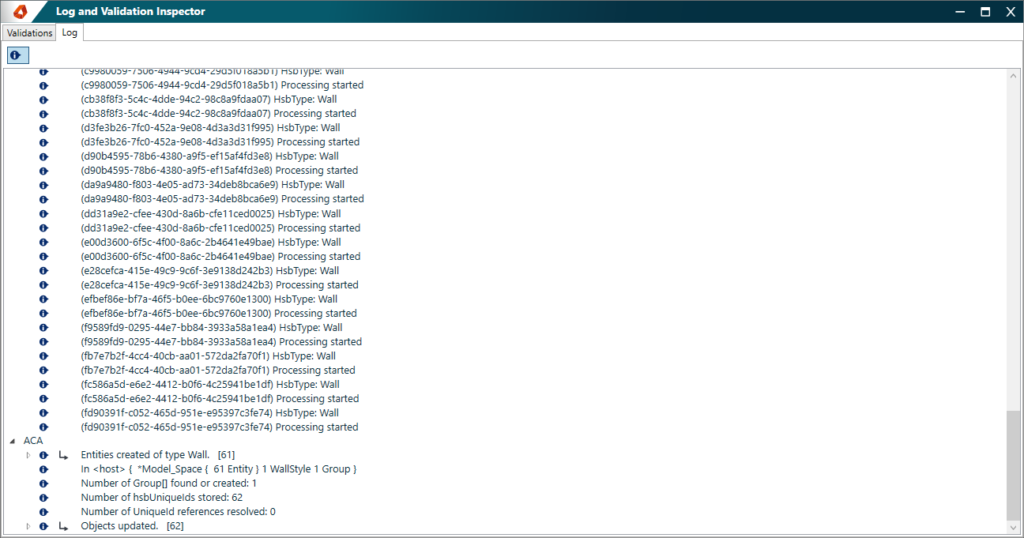
In the Log tab you will see the log of the extensions that have been run and the log of the import in ACA:
In the validations tab you will see the outcome of the validations that have been run after the import.
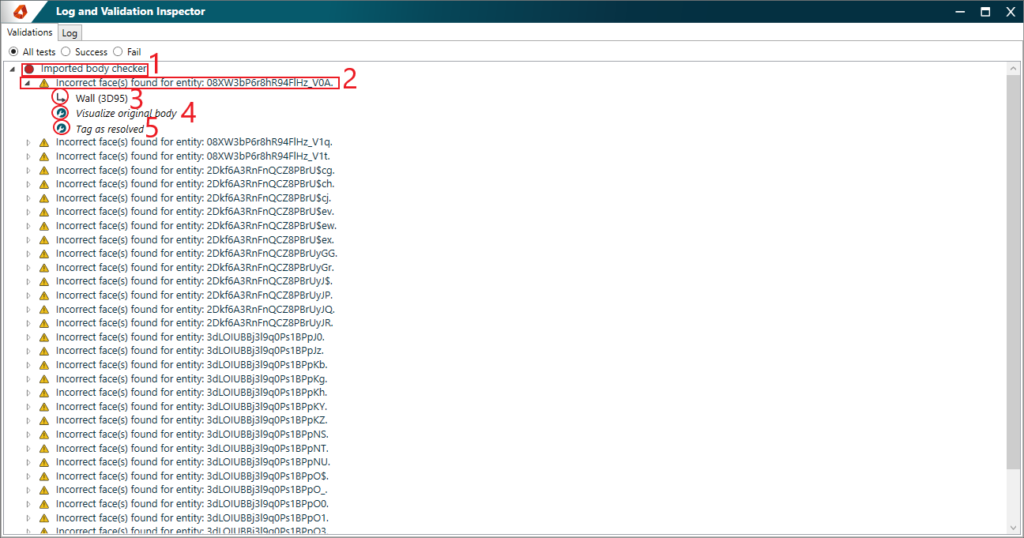
2. The message per entity
3. Zoom to the entity
4. Resolution to visualize the original body
5. Resolution to tag the message as resolved
The Validation inpector will give you a list of validations that have failed1, each validation can have multiple entities that fail2. You can zoom to the entity3 and you can also apply resolutions.
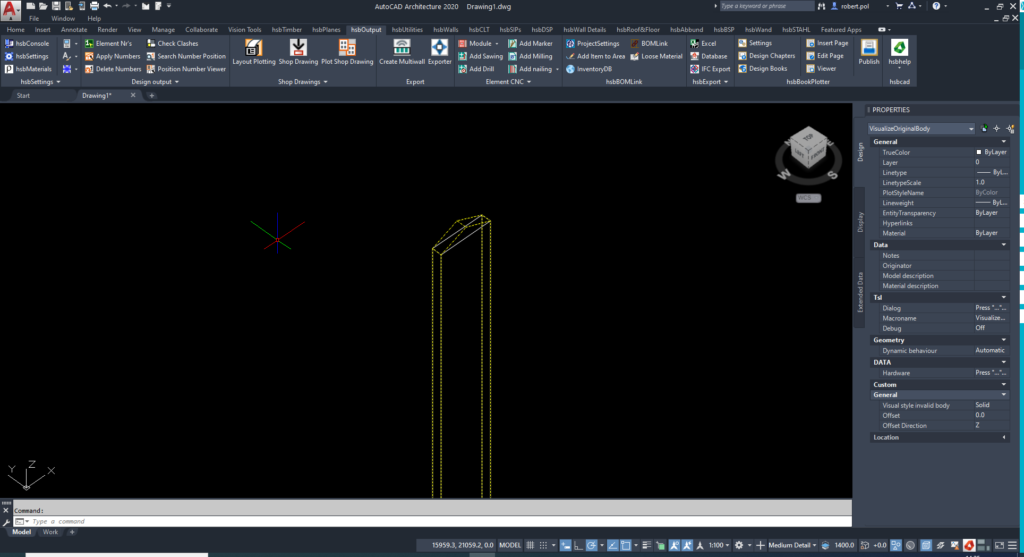
For example the Visualize original body will create a tsl that will display the original body of the entity that was imported, this can be used to check the import and/or change it manually:
