Revit®| hsbTimber for Autodesk Revit® (Video)
This document will show you the different actions on the hsbTimber Ribbon in Autodesk Revit.

Create
Structural Member

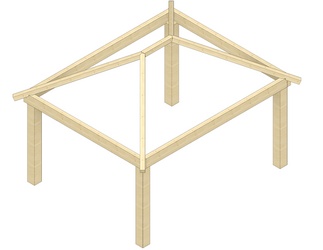
Adds an hsbcad beam family instance.
Insert
Select the command.
The standard Revit beam command is executed with the family type set to the hsbcad beam family.
When you have created multiple types from the hsbcad beam family, A dialog box will open called Select Family type, select a Beam (Framing) or Column in the pull down menu.
You can draw a beam like you are used to in Revit.
BLOCK_INFO_START
Beam will always have the hsbFabrication Model present.
BLOCK__END
Behaviour
The Beam is a native Revit beam with a Structural framing category. All tools can be used on any family that is from the Structural framing category.
Structural Sheet
Adds a hsbcad Sheet family instance.
Insert
Select the command.
The standard Revit sheet command is executed with the family type set to the hsbcad sheet family.
When you have created multiple types from the hsbcad sheet family, a dialog box will open called Select Family type, select a Sheet(Framing) in the pull-down menu.
You can draw a sheet like you are used to drawing structural framing in Revit.
Behaviour
The Sheet is a native Revit family with a Structural framing category. All tools can be used on any family that is from the Structural framing category.
Frame Edges

Add structural members to edges of Roofs/Walls/Floors.

Insert
Select the command.
Select the edges, you can window select or click on individual surfaces (a plus mark appears when a surface hasn‘t been selected yet).
Deselect the surface by re-clicking or window select (a minus mark will appear on surfaces that already have been selected).
In order to finish or cancel the selection, go to the options bar. You can also confirm selection by pressing.
After finishing the selection a dialog with available structural members (that have the hsbFabrication Model present) will pop up.
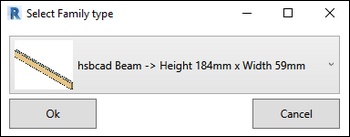
Select the structural member type you want to add to the selected edges.
After clicking Ok, the structural members are added.
Behavior
Tools for connections need to be added manually.
The structural members are not repositioned after changes to the Roof/Wall/Floor.
Frame Surfaces

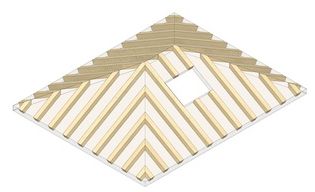
Add beam systems to surfaces.
Insert
Select the command.
Select the surfaces, you can window select or click on individual surfaces (a plus mark appears when a surface hasn‘t been selected yet).
Deselect the surface by re-clicking or window select (a minus mark will appear on surfaces that already have been selected).
In order to finish or cancel the selection, go to the options bar. You can also confirm selection by pressing.
After finishing the selection a dialog with available structural members (that have the“hsbFabrication Model“ present) will pop up.

Select the structural member type you want to use for the beam systems.
After clicking Ok, the beam systems are added to the selected surfaces.
Behavior
Tools for connections need to be added manually.
The beam systems are not repositioned after changes to the surface.
The beam systems will have a fixed set of parameter values, these values can be changed afterwards.
Tools
Tools on structural member
Adds different Tools to Structural Members.
Tools on structural member(s) LINK to this page.
Automated Tools
Automated Tools
Automatically Adds different Tools to Structural Members
Insert
- Select any of the automated tools from the dropdown.
- Select the the hsbcad elements where you would like to add the automated tools on and press enter.

After this, you can de-select each object. When you do this, the icon will turn from a plus sign to a minus sign. After you have selected where you would like to have tools, you can press enter and every tool will be automatically added.
Behavior
Tools for connections can be added automatically.
The added tool will be exactly the same tool as if it was added manually.
Hangers
Add Hangers

Adds Hanger(s) to connecting structural members.

Insert
- Select 2 structural members, select Enter or the Finish button.
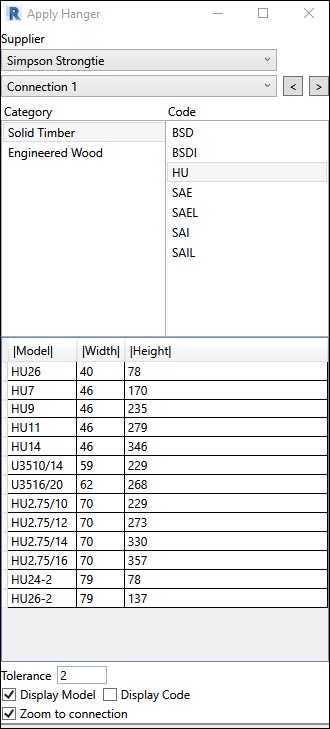
A dialog box will open Apply Hanger, Use this dialog to add hangers to all or individual connections.
You can switch between connections, add connections one by one and zoom between connections.
A wide variety of common hangers are available.
After finishing the selection a dialog with available structural members (that have the hsbFabrication Model present) will pop up.
Here you can select the structural member type you want to use for the beam systems.
After clicking Ok, the beam systems are added to the selected surfaces.
Utilities
Recalc

Recalculate the hsbcad entities (elements).
Insert
Triggers hsbcad Coded Family Extensions to execute.
The elements connected will be re-created.
BLOCK_INFO_START
This can solve possible issues with hsbcad families.
BLOCK__END
Create PosNums

Adds position Numbers to structural members.
The hsbPosnum parameter value is set after analysis of the selected solid(s).
Each equal solid will get the same value, this number can be used for identifying objects for machining and ordering purposes.
Insert
Select the command.
Select the Structural Members, you can select with a window or click on individual Structural Member (a plus mark appears when Structural Member hasn‘t been selected yet).
Deselect the Structural Members by re-clicking or window select (a minus mark will appear on Structural Members that already have been selected).
In order to finish or cancel the selection go to the options bar.
You can also confirm selection by pressing enter.
After finishing the Posnum Settings dialog will pop up.
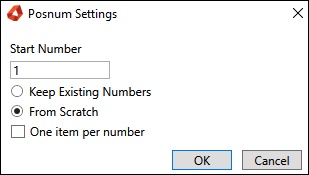
You can select the Start Number, this will be the number that will be assigned to the first beam. The rest of the beams will get an increasing number.
The keep existing numbers option will not overwrite the current value of the PosNum parameter.
The From Scratch option will delete the existing value of the PosNum parameter and assign new numbers from scratch.
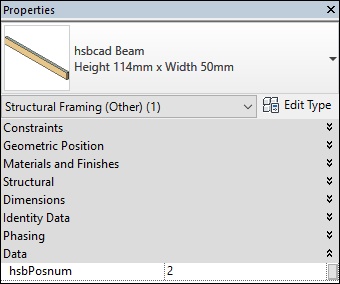
After finishing the hsbPosnum parameters value is assigned to the “hsbRevit Beam”.
BLOCK_ALERT_START
The hsbPosnum parameter can be overwritten manually, but this is not recommended.
BLOCK__END
Support Tools

Support Tools: This adds Support Tools. (LINK to external page)
Dimensions
Shop Drawings

Creates shopdrawings from sheet templates.
Create For Structural Member
Create shopdrawings from sheet templates for Structural Members
Activate Shopdrawing Template
Sets current sheet to Shopdrawing Templates.
Export (Video)
Exporter

Sends an hsbcad model to the hsb export manager.
The hsb export manager is a separate application outside hsbcad that can export an hsbcad model to a variety of file formats.
From machine files to formats like .ifc and .pdf
Exporter LINK to a different page.
ModelX Export (Video)
Exports selected Elements to an hsbCAD ModelExchange File.
Insert
Select the command.
The Dialog box hsbcad Exporter will open.
Select the options that you want to export.
Filter:
hsbcad Elements - Are Elements with hsbcad intelligence.
Item Containers - This is a group of Elements.
Architectural Items (Wall/Roof/Floor) - These are all the Architectural items.
Elements - These are all Revit Elements.
Model Name:
Give a name to the file you want to save.
Destination Directory Path:
The file will be saved at the destination directory you have selected.
Select OK, a *.hmlx file be generated and saved in the destination folder you have entered.
hsbShare

Send your model to hsbshare, an app to facilitate communication channels between project owners and stakeholders, for sharing of extended meta data orientated around a 3D model.
This centralized tool is shared among design offices, site teams and building owners
hsbShare LINK to this External page.
Import
ModelX Import
The modelX import allows you to import a ModelExchange file to selected Elements which will be imported in Revit. The only items that can be imported at this moment are beams and sheeting.
After you have selected the ModelX Import button, the following image will pop up:
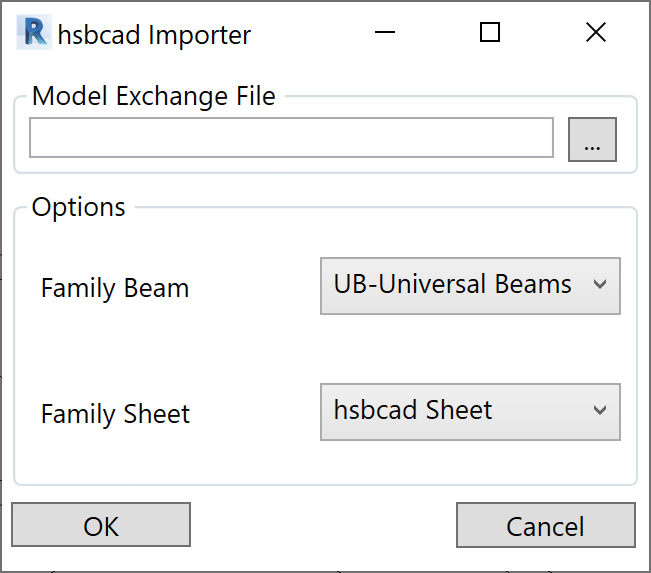
Model Exchange File:
This will be the file that will be imported into the Revit model. You can navigate to the file by pressing the 3 dots.
Family Beam:
This is the dropdown that allows you to select the Revit Family you would like to use as the Beam family. You can create multiple other families in Revit and use these.
Family Sheet:
This is the dropdown that allows you to select the Revit Family you would like to use as the Sheet family. You can create multiple other families in Revit and use these.
Settings
Settings

Select to customize the hsbcad settings.
This shows a dialog where you can configure the hsbcad settings.
Settings LINK to this External page. Under
Help
hsbAcademy

Provide access to online help and other resources.
hsbAcademy user Guide LINK to this External page.
Account Info
More information on Purchase Options, Account info, app update, About.
Purchase Options

This option will direct you to the website for more info.
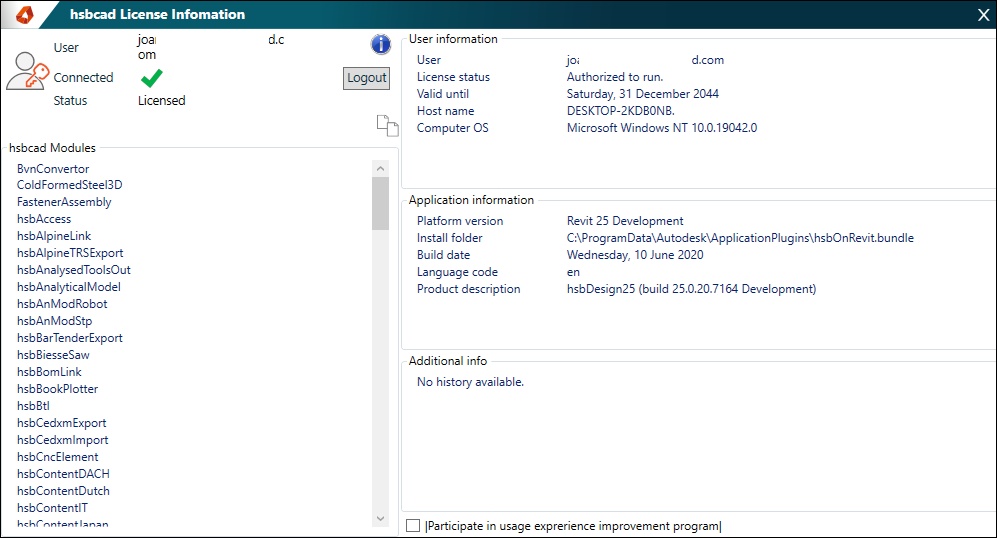
Account Info
Gives you License information.
Update

Update: Updates the hsbDesign to the latest release available
Repair: The Repair option will force an update to the latest available release.
The update option will check for the most recent available update and will not update if none are available.
Update/Repair LINK to this External page.
About

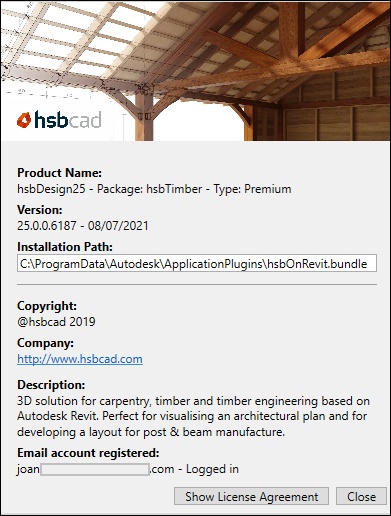
Displays the information about your current version of the installed hsbDesign plugin.
